This is our Radial Insertion machine offline software, you can learn how to program and operate the machine (password: smthelp.net) (engineer password: 123456 or 12345678)


This is our Radial Insertion machine offline software, you can learn how to program and operate the machine (password: smthelp.net) (engineer password: 123456 or 12345678)

Cut and Clinch Footprints
The cut and clinch cuts the component leads after they are inserted
through the PC board and then clinches them against the underside
of the PC board, securing the component in place.


Simplifies receiving, storage and retrieval
Delivers full traceability
Automatically monitors stock levels
The SMT intelligent electronic material rack is a high floor area ratio shelf used to store the SMT patch devices.When loading, the materials are placed in the corresponding card position according to the plate, bind the LED indicator on the shelf through the corresponding relationship of the QR code of the material number / card position, and the ERP / MES system of the docking enterprise will automatically realize the operation of sending and receiving materials according to the light indication.
Delivery time is saved from two hours to 15 minutes, efficiency increase 8 times
Each shelf can store 1,400 plates of materials disorderly, and save the inventory area by 40%
The location of each item is quickly checked, and the inventory time can be reduced from 2 days to 2 hours
Material / warehouse / work order / station automatic binding, feeding and feeding process can prevent rigidity and error
We understand that SMT machine training and after sales service are a key to choose a new supplier.
Please click below links to see machine 3D models:
https://www.smthelp.net/html/SMT Production line.html https://www.smthelp.net/html/THT_Auto_Insertion_full_line.html
SMT AI Peripheral Equipments and Spare parts
| Item | Product Name | URL |
| 1 | Bicycle | https://www.smthelp.net/html/Bicycle.html |
| 2 | FUJI_NXT_8mmfeeder | https://www.smthelp.net/html/FUJI_NXT_8mmfeeder.html |
| 3 | IC_tube_to_reeltapepackingmachine | https://www.smthelp.net/html/IC_tube_to_reeltapepackingmachine.html |
| 4 | PCBA_THT_fixture | https://www.smthelp.net/html/PCBA_THT_fixture.html |
| 5 | RS-1_Vibration_tube_FEEDER_BANK | https://www.smthelp.net/html/RS-1_Vibration_tube_FEEDER_BANK.html |
| 6 | SMT Label feeder.htm | https://www.smthelp.net/html/SMT Label feeder.htm |
| 7 | SMT reel tape feeder 72mm width | https://www.smthelp.net/html/SMT reel tape feeder 72mm width.html |
| 8 | SMT_axial_Radial_feeder_bank | https://www.smthelp.net/html/SMT_axial_Radial_feeder_bank.html |
| 9 | SMT_label_mounter | https://www.smthelp.net/html/SMT_label_mounter.html |
| 10 | SMT_Odd_Bowl_feeder | https://www.smthelp.net/html/SMT_Odd_Bowl_feeder.html |
| 11 | SMT_tray_feeder_B | https://www.smthelp.net/html/SMT_tray_feeder_B.html |
| 12 | SMThelp_PCBA-smt | https://www.smthelp.net/html/SMThelp_PCBA-smt.html |
| 13 | UIC_autoinsertion_Spareparts_list | https://www.smthelp.net/html/UIC_autoinsertion_Spareparts_list.html |
| 14 | wave_soldering_line | https://www.smthelp.net/html/wave_soldering_line.html |
| 15 | Wave soldering machine | https://www.smthelp.net/html/Wave soldering machine.html |
| 16 | Adapter JUKI Nozzle with Nozzle | https://www.smthelp.net/html/Adapter JUKI Nozzle with Nozzle.html |
| 17 | Auto Insertion Axial Radial Oddform Production line | https://www.smthelp.net/html/Auto Insertion Axial Radial Oddform Production line.html |
| 18 | Bowl Radial reel feeder w JUKI cart | https://www.smthelp.net/html/Bowl Radial reel feeder w JUKI cart.html |
| 19 | Conveyor 1M nolight | https://www.smthelp.net/html/Conveyor 1M nolight.html |
| 20 | Feeder cart-Bowl Axial Radial Tube | https://www.smthelp.net/html/Feeder cart-Bowl Axial Radial Tube.html |
| 21 | FUJI glue nozzle | https://www.smthelp.net/html/FUJI glue nozzle.html |
| 22 | FUJI nozzle WGW-CZ | https://www.smthelp.net/html/FUJI nozzle WGW-CZ.html |
| 23 | FUJI nozzle WJH-CZ | https://www.smthelp.net/html/FUJI nozzle WJH-CZ.html |
| 24 | fuji NXT 8mm feeder | https://www.smthelp.net/html/fuji NXT 8mm feeder.html |
| 25 | fuji NXT 8mm feeder | https://www.smthelp.net/html/fuji NXT 8mm feeder.html |
| 26 | FUJI Sfab Radial tape feeder | https://www.smthelp.net/html/FUJI Sfab Radial tape feeder.html |
| 27 | Gripper nozzle for E-cap | https://www.smthelp.net/html/Gripper nozzle for E-cap.html |
| 28 | Hign end conveyor 1M w PCBA | https://www.smthelp.net/html/Hign end conveyor 1M w PCBA.html |
| 29 | JUKI 2 layer bowl feeder w cart | https://www.smthelp.net/html/JUKI 2 layer bowl feeder w cart.html |
| 30 | JUKI Gripper_Nozzle 2583 C | https://www.smthelp.net/html/JUKI Gripper_Nozzle 2583 C.html |
| 31 | Juki Nozzle 500 Assembly | https://www.smthelp.net/html/Juki Nozzle 500 Assembly.html |
| 32 | Juki Nozzle 500 Head Assembly | https://www.smthelp.net/html/Juki Nozzle 500 Head Assembly.html |
| 33 | JUKI Radial tape feeder big span | https://www.smthelp.net/html/JUKI Radial tape feeder big span.html |
| 34 | JUKI Radial tape L lead feeder | https://www.smthelp.net/html/JUKI Radial tape L lead feeder .html |
| 35 | Juki2050 Feeder Cart w Radial axial | https://www.smthelp.net/html/Juki2050 Feeder Cart w Radial axial.html |
| 36 | Mobile charger PCBA | https://www.smthelp.net/html/Mobile charger PCBA.html |
| 37 | Nozzle adepter | https://www.smthelp.net/html/Nozzle adepter.html |
| 38 | Nozzle base | https://www.smthelp.net/html/Nozzle base.html |
| 39 | Odd form insertion Feeders w loader-unloader | https://www.smthelp.net/html/Odd form insertion Feeders w loader-unloader.html |
| 40 | Panasonic Al Spare parts list 2 | https://www.smthelp.net/html/Panasonic Al Spare parts list 2.html |
| 41 | Panasonic CM602 Bowl feeder | https://www.smthelp.net/html/Panasonic CM602 Bowl feeder.html |
| 42 | PCB Combo loader destacker+Magazine | https://www.smthelp.net/html/PCB Combo loader destacker+Magazine.html |
| 43 | PCB Magazine | https://www.smthelp.net/html/PCB Magazine.html |
| 44 | Power supplier | https://www.smthelp.net/html/Power supplier.html |
| 45 | Radial Cutter clinch head | https://www.smthelp.net/html/Radial Cutter clinch head.html |
| 46 | Radial Insertion Head Assy w Ecap | https://www.smthelp.net/html/Radial Insertion Head Assy w Ecap.html |
| 47 | RS-1 FEEDER BANK w Vibe tube feeder | https://www.smthelp.net/html/RS-1 FEEDER BANK w Vibe tube feeder.html |
| 48 | S3010A Radial Insertion machine inline | https://www.smthelp.net/html/S3010A Radial Insertion machine inline.html |
| 49 | S3010A Radial machine no cover | https://www.smthelp.net/html/S3010A Radial machine no cover.html |
| 50 | S7000 Odd Form Insertion machine | https://www.smthelp.net/html/S7000 Odd Form Insertion machine.html |
| 51 | S7000 Oddform insertion 3 bowl feeder | https://www.smthelp.net/html/S7000 Oddform insertion 3 bowl feeder.html |
| 52 | S700D Odd Form Insertion machine | https://www.smthelp.net/html/S700D Odd Form Insertion machine.html |
| 53 | S-7020T Terminal insertion | https://www.smthelp.net/html/S-7020T Terminal insertion.html |
| 54 | S-7040 Oddform insertion w 4 bowl feeder | https://www.smthelp.net/html/S-7040 Oddform insertion w 4 bowl feeder.html |
| 55 | S-7040T Oddform insertion w Tray feeder | https://www.smthelp.net/html/S-7040T Oddform insertion w Tray feeder.html |
| 56 | SBH250 NGOK dual nagazine PCB unloader w magazine | https://www.smthelp.net/html/SBH250 NGOK dual nagazine PCB unloader w magazine.html |
| 57 | SBU460 Bare PCB destacker loader +conveyor | https://www.smthelp.net/html/SBU460 Bare PCB destacker loader +conveyor.html |
| 58 | SLD250 PCB loader w magazine | https://www.smthelp.net/html/SLD250 PCB loader w magazine.html |
| 59 | SLD250 S4020A+S3010A SULD250 Al machine production line | https://www.smthelp.net/html/SLD250 S4020A+S3010A SULD250 Al machine production line.html |
| 60 | SLD250+ S3020A +SULD250 Radial Insertion machine inline | https://www.smthelp.net/html/SLD250+ S3020A +SULD250 Radial Insertion machine inline.html |
| 61 | SLD250+S3010A(s)+SULD250 Al machine production line | https://www.smthelp.net/html/SLD250+S3010A(s)+SULD250 Al machine production line.html |
| 62 | SLD250+S3010A+S7040T(tray feeder)+SULD250 Al machine production line | https://www.smthelp.net/html/SLD250+S3010A+S7040T(tray feeder)+SULD250 Al machine production line.html |
| 63 | SLD390 SMT PCB loader (L-R) | https://www.smthelp.net/html/SLD390 SMT PCB loader (L-R).html |
| 64 | SLD390L SMT PCB loader(L-R) | https://www.smthelp.net/html/SLD390L SMT PCB loader(L-R).html |
| 65 | SLD390L SMT PCB loader(L-R)w magazine | https://www.smthelp.net/html/SLD390L SMT PCB loader(L-R)w magazine.html |
| 66 | SLVC200 Vacuum PCB loader +conveyor | https://www.smthelp.net/html/SLVC200 Vacuum PCB loader +conveyor.html |
| 67 | SLVC200 Vacuum PCB loader | https://www.smthelp.net/html/SLVC200 Vacuum PCB loader.html |
| 68 | SMT 2 rail bowl feeder | https://www.smthelp.net/html/SMT 2 rail bowl feeder.html |
| 69 | SMT BHS line1 | https://www.smthelp.net/html/SMT BHS line1.html |
| 70 | SMT CART FEEDER | https://www.smthelp.net/html/SMT CART FEEDER.html |
| 71 | SMT customized nozzle design n manufacturing | https://www.smthelp.net/html/SMT customized nozzle design n manufacturing.html |
| 72 | SMT Drone main control board | https://www.smthelp.net/html/SMT Drone main control board.html |
| 73 | SMT Gripper nozzle customized | https://www.smthelp.net/html/SMT Gripper nozzle customized.html |
| 74 | SMT Gripper nozzle JUKI | https://www.smthelp.net/html/SMT Gripper nozzle JUKI.html |
| 75 | SMT label feeder | https://www.smthelp.net/html/SMT label feeder.html |
| 76 | SMT nozzle list 1 | https://www.smthelp.net/html/SMT nozzle list 1.html |
| 77 | SMT Nozzle MiniChuck_closing w component | https://www.smthelp.net/html/SMT Nozzle MiniChuck_closing w component.html |
| 78 | SMT PCB 90 turn conveyor | https://www.smthelp.net/html/SMT PCB 90 turn conveyor.html |
| 79 | SMT PCB conveyor 1M w lighting | https://www.smthelp.net/html/SMT PCB conveyor 1M w lighting.html |
| 80 | SMT PCB Flipper (turn over) + conveyor w PCBA | https://www.smthelp.net/html/SMT PCB Flipper (turn over) + conveyor w PCBA.html |
| 81 | SMT PCB Flipper (turn over) conveyor | https://www.smthelp.net/html/SMT PCB Flipper (turn over) conveyor.html |
| 82 | SMT PCB Shuttle conveyor | https://www.smthelp.net/html/SMT PCB Shuttle conveyor.html |
| 83 | SMT PnP mounter | https://www.smthelp.net/html/SMT PnP mounter.html |
| 84 | SMT Production line | https://www.smthelp.net/html/SMT Production line.html |
| 85 | SMT reflow oven | https://www.smthelp.net/html/SMT reflow oven.html |
| 86 | SMT Screen printer | https://www.smthelp.net/html/SMT Screen printer.html |
| 87 | SMT THT bare PCB board | https://www.smthelp.net/html/SMT THT bare PCB board.html |
| 88 | SMT THT DC Power PCBA | https://www.smthelp.net/html/SMT THT DC Power PCBA.html |
| 89 | SMT tray feeder -B | https://www.smthelp.net/html/SMT tray feeder -B.html |
| 90 | SMT Tray feeder | https://www.smthelp.net/html/SMT Tray feeder.html |
| 91 | SMT tube feeder | https://www.smthelp.net/html/SMT tube feeder.html |
| 92 | SMT Vacuum Nozzle 505 | https://www.smthelp.net/html/SMT Vacuum Nozzle 505.html |
| 93 | SMThelp Axial taped feeder | https://www.smthelp.net/html/SMThelp Axial taped feeder.html |
| 94 | SMThelp PCB BHS production line | https://www.smthelp.net/html/SMThelp PCB BHS production line.html |
| 95 | SMThelp PCB Magazine w PCBA | https://www.smthelp.net/html/SMThelp PCB Magazine w PCBA.html |
| 96 | SMThelp PCBA 2 in 1 | https://www.smthelp.net/html/SMThelp PCBA 2 in 1.html |
| 97 | SMThelp SMT-THT pcba 8in1 | https://www.smthelp.net/html/SMThelp SMT-THT pcba 8in1.html |
| 98 | SMThelp THT pcb assembly 9in1 | https://www.smthelp.net/html/SMThelp THT pcb assembly 9in1.html |
| 99 | SMThelp THT pcba | https://www.smthelp.net/html/SMThelp THT pcba.html |
| 100 | SULD250 PCB Unloader (R-L) | https://www.smthelp.net/html/SULD250 PCB Unloader (R-L).html |
| 101 | SULD390 PCB Unloader (L-R) | https://www.smthelp.net/html/SULD390 PCB Unloader (L-R).html |
| 102 | SULD390 PCB Unloader (R-L) w Magazine | https://www.smthelp.net/html/SULD390 PCB Unloader (R-L) w Magazine.html |
| 103 | SULD390 PCB Unloader (R-L) | https://www.smthelp.net/html/SULD390 PCB Unloader (R-L).html |
| 104 | SULD390 PCB Unloader (R-L) | https://www.smthelp.net/html/SULD390 PCB Unloader (R-L).html |
| 105 | SULD460 L-type PCB unloader (L-R) | https://www.smthelp.net/html/SULD460 L-type PCB unloader (L-R).html |
| 106 | THT axial radial PCBA | https://www.smthelp.net/html/THT axial radial PCBA.html |
| 107 | THT Capacitor lead cut-forming | https://www.smthelp.net/html/THT Capacitor lead cut-forming.html |
| 108 | Tray feeder w feeder bank | https://www.smthelp.net/html/Tray feeder w feeder bank.html |
| 109 | Tray feeder | https://www.smthelp.net/html/Tray feeder.html |
| 110 | UIC BHS Assy | https://www.smthelp.net/html/UIC BHS Assy.html |
| 111 | UIC FJ head assy | https://www.smthelp.net/html/UIC FJ head assy.html |
| 112 | UIC Radial Carrier Clip | https://www.smthelp.net/html/UIC Radial Carrier Clip.html |
| 113 | UIC Radial Feeder and Carrier Clip (1) | https://www.smthelp.net/html/UIC Radial Feeder and Carrier Clip (1).html |
| 114 | UIC Radial lead component carrier clip w Ecap | https://www.smthelp.net/html/UIC Radial lead component carrier clip w Ecap.html |
| 115 | UIC Radial lead component carrier clip | https://www.smthelp.net/html/UIC Radial lead component carrier clip.html |
| 116 | UIC spare parts list 3 | https://www.smthelp.net/html/UIC spare parts list 3.html |
| 117 | wave soldering line | https://www.smthelp.net/html/wave soldering line.html |
| 118 | Wave soldering output conveyor | https://www.smthelp.net/html/Wave soldering output conveyor.html |
| 119 | What is SMT Gripper nozzle | https://www.smthelp.net/html/What is SMT Gripper nozzle.html |
| 120 | What is SMT Gripper nozzle | https://www.smthelp.net/html/What is SMT Gripper nozzle.html |
| 121 | X_Y_workingtable | https://www.smthelp.net/html/X_Y_workingtable.html |
| 122 | Yamaha nozzle YMH-100ll-31 | https://www.smthelp.net/html/Yamaha nozzle YMH-100ll-31.html |
| 123 | Yamaha nozzle YMH-100ll-31 | https://www.smthelp.net/html/Yamaha nozzle YMH-100ll-31.html |
| 124 | Yamaha nozzleYMH-112-52 | https://www.smthelp.net/html/Yamaha nozzleYMH-112-52.html |
| 125 | Yamaha nozzleYMH-112-52 | https://www.smthelp.net/html/Yamaha nozzleYMH-112-52.html |
| 126 | Ymaha nozzle YMH-112-52 | https://www.smthelp.net/html/Ymaha nozzle YMH-112-52.html |
| 127 | Ymaha nozzle YMH-112-52 | https://www.smthelp.net/html/Ymaha nozzle YMH-112-52.html |
| 128 | Auto Tray n Tube stick feeder with Robot platform | https://www.smthelp.net/html/Auto Tray n Tube stick feeder with Robot platform.html |
THT production line:
| Item | Product Name | URL |
| 1 | S3010A Radial Insertion Machine | https://www.smthelp.net/html/S3010A Radial Insertion Machine.html |
| 2 | S7000P Pin Eyelet Inserter w loader | https://www.smthelp.net/html/S7000P Pin Eyelet Inserter w loader.html |
| 3 | S4000H JW Axial Insertion machine w loader | https://www.smthelp.net/html/S4000H JW Axial Insertion machine w loader.html |
| 4 | THT Auto Insertion full line | https://www.smthelp.net/html/THT_Auto_Insertion_full_line.html |
| 5 | wave soldering line | https://www.smthelp.net/html/wave soldering line.html |
| 6 | Xy workingtable | https://www.smthelp.net/html/X_Y_workingtable.html |
| 7 | PIN Eyelet Odd inserter | https://www.smthelp.net/html/PIN_Eyelet_Odd_inserter.html |
| 8 | S7000T Reel tape terminal inserter w PCB loading | https://www.smthelp.net/html/S7000T Reel tape terminal inserter w PCB loading.html |
| 9 | Manual Assembly line | https://www.smthelp.net/html/Manual Assembly line.html |
| 10 | Terminal PIN Eyelet Inserter 2 headbowl PCB | https://www.smthelp.net/html/Terminal_PIN_Eyelet_Inserter_2_head_bowl_PCB.html |
| 11 | S-7020TTerminalinsertion | https://www.smthelp.net/html/S-7020T_Terminal_insertion.html |
| 12 | S7000T Reeltape terminal inserter w PCB loading | https://www.smthelp.net/html/S7000T_Reel_tape_terminal_inserter_w_PCB loading.html |
| 13 | S7040 Oddform Insertion machine x2 w F-B feeders PCB loading | https://www.smthelp.net/html/S7040 Oddform Insertion machine x2 w F-B feeders PCB loading.html |
| 14 | S7040 Oddform Insertion machine x2 w Front feeders | https://www.smthelp.net/html/S7040 Oddform Insertion machine x2 w Front feeders.html |
| 15 | S7040 OddFrom Insertion Machine w feeder PCB loading | https://www.smthelp.net/html/S7040 OddFrom Insertion Machine w feeder PCB loading.html |
| 16 | S7040 Oddform Insertion machine w Front feeders | https://www.smthelp.net/html/S7040 Oddform Insertion machine w Front feeders.html |
| 17 | Manual assemble line 2 | https://www.smthelp.net/html/Manual assemble line 2.html |
| 18 | S3010A Radial Insertion Machine w PCB loader inloader | https://www.smthelp.net/html/S3010A Radial Insertion Machine w PCB loader inloader.html |
| 19 | Wave Soldering machine and Manual assemble line 2 | https://www.smthelp.net/html/Wave Soldering machine and Manual assemble line 2.html |
| 20 | S7040 Oddform Insertion machine | https://www.smthelp.net/html/S7040 Oddform Insertion machine.html |
| 21 | SLD250 PCB Magazine Loader (250mm) w PCB | https://www.smthelp.net/html/SLD250 PCB Magazine Loader (250mm) w PCB.html |
| 22 | S3010A Radial Insertion machine inline | https://www.smthelp.net/html/S3010A Radial Insertion machine inline.html |
| 23 | SLD250 S3020ASULD250 Radial Insertion machine inline | https://www.smthelp.net/html/SLD250+%20S3020A%20+SULD250%20Radial%20Insertion%20machine%20inline.html |
SMT production line:
| Item | Product Name | URL |
| 1 | Mutil Line shuttle to 3 oven | https://www.smthelp.net/html/Mutil Line shuttle to 3 oven.html |
| 2 | Reflow Oven 8 zones | https://www.smthelp.net/html/Reflow Oven 8 zones.html |
| 3 | SMT loader Printer SPI NXT M3x4 (R-L) | https://www.smthelp.net/html/SMT loader Printer SPI NXT M3x4 (R-L).html |
| 4 | SMT Line Loader DEK SPI NXT | https://www.smthelp.net/html/SMT Line Loader DEK SPI NXT.html |
| 5 | SMTLineLoaderDEKSPINXT | https://www.smthelp.net/html/SMTLineLoaderDEKSPINXT.html |
| 6 | SMT_mounter | https://www.smthelp.net/html/SMT_mounter.html |
| 7 | PCBA Manual assembly with Wave Soldering machine line | https://www.smthelp.net/html/PCBA Manual assembly with Wave Soldering machine line.html |
| 8 | SMT Line L-R loader printer SPI mounter | https://www.smthelp.net/html/SMT Line L-R loader printer SPI mounter.html |
| 9 | DEK Printer | https://www.smthelp.net/html/DEK Printer.html |
| 10 | AOI with NGOK Unloader | https://www.smthelp.net/html/AOI with NGOK Unloader.html |
| 11 | NG Buffer 1M | https://www.smthelp.net/html/NG Buffer 1M.html |
| 12 | SMTtrayfeederwpickuphead | https://www.smthelp.net/html/SMTtrayfeederwpickuphead.html |
| 13 | Dual Magazine Unloader | https://www.smthelp.net/html/Dual Magazine Unloader.html |
| 14 | DualMagazineUnloader | https://www.smthelp.net/html/DualMagazineUnloader.html |
| 15 | SMT Mounter | https://www.smthelp.net/html/SMT Mounter.html |
| 16 | SMT Mounter.sync-conflict-20220307-122016-RCA3U2I | https://www.smthelp.net/html/SMT Mounter.sync-conflict-20220307-122016-RCA3U2I.html |
| 17 | PCB NG Buffer conveyor 0.8M length 460mm width | https://www.smthelp.net/html/PCB NG Buffer conveyor 0.8M length 460mm width.html |
| 18 | S350DLC_1Mconveyorwithlightingcooling | https://www.smthelp.net/html/S350DLC_1Mconveyorwithlightingcooling.html |
| 19 | PCB Buffer with cooling L-R 1M | https://www.smthelp.net/html/PCB Buffer with cooling L-R 1M.html |
| 20 | PCB NGOK Unloader | https://www.smthelp.net/html/PCB NGOK Unloader.html |
| 21 | Dual line Unloader | https://www.smthelp.net/html/Dual line Unloader.html |
| 22 | PCB Magazine and Vacuum combo loader w PCB | https://www.smthelp.net/html/PCB Magazine and Vacuum combo loader w PCB.html |
| 23 | SLD250 PCB Magazine Loader (250mm) | https://www.smthelp.net/html/SLD250 PCB Magazine Loader (250mm).html |
| 24 | PCB Magazine and Vacuum combo loader | https://www.smthelp.net/html/PCB Magazine and Vacuum combo loader.html |
| 25 | Dual line shuttle to Dual rail oven | https://www.smthelp.net/html/Dual line shuttle to Dual rail oven.html |
| 26 | SMT production line std | https://www.smthelp.net/html/SMT production line std.html |
| 27 | SMT product line 1 | https://www.smthelp.net/html/SMT product line 1.html |
| 28 | Dual rail Oven Buffer AOI Unloader | https://www.smthelp.net/html/Dual rail Oven Buffer AOI Unloader.html |
| 29 | Mutil Line NXT shuttle to 1 oven.htm | https://www.smthelp.net/html/Mutil Line NXT shuttle to 1 oven.htm |
| 30 | SMT production line loader printer mounter | https://www.smthelp.net/html/SMT production line loader printer mounter.html |
| 31 | SMT production line loader printer mounter R-L | https://www.smthelp.net/html/SMT production line loader printer mounter R-L.html |
| 32 | SMT product line Printer Mounter Over w loader magazine | https://www.smthelp.net/html/SMT product line Printer Mounter Over w loader magazine.html |
| 33 | SMTvacuumnozzl | https://www.smthelp.net/html/SMTvacuumnozzl.html |
| 34 | Wave soldering machine | https://www.smthelp.net/html/Wave soldering machine.html |
| 35 | LED-mounter_semiauto | https://www.smthelp.net/html/LED-mounter_semiauto.html |
| 36 | UIC FJ 7 head assy | https://www.smthelp.net/html/UIC FJ 7 head assy.html |
| 37 | SMT tube feeder | https://www.smthelp.net/html/SMT tube feeder.html |
| 38 | Desktop SMT pick n place mounter | https://www.smthelp.net/html/Desktop SMT pick n place mounter.html |
| 39 | DesktopSMTpicknplacemounter | https://www.smthelp.net/html/DesktopSMTpicknplacemounter.html |
| 40 | SMTreeltapefeeder | https://www.smthelp.net/html/SMTreeltapefeeder.html |
| 41 | SMT shuttle machine | https://www.smthelp.net/html/SMT shuttle machine.html |
| 42 | Wave soldering input conveyor | https://www.smthelp.net/html/Wave soldering input conveyor.html |
| 43 | SMT placement head 6 nozzles | https://www.smthelp.net/html/SMT placement head 6 nozzles.html |
| 44 | SMT UIC IL 4 head base assy | https://www.smthelp.net/html/SMT UIC IL 4 head base assy.html |
| 45 | Magazine S | https://www.smthelp.net/html/Magazine S.html |
| 46 | SMT Label feeder | https://www.smthelp.net/html/SMT Label feeder.html |
| 47 | Manual assemble line 2 | https://www.smthelp.net/html/Manual assemble line 2.html |
| 48 | SMTLabelfeeder | https://www.smthelp.net/html/SMTLabelfeeder.html |
| 49 | PCB NG Buffer conveyor 0.8M length 460mm width.htm | https://www.smthelp.net/html/PCB NG Buffer conveyor 0.8M length 460mm width.htm |
| 50 | Radial Feeder | https://www.smthelp.net/html/Radial Feeder.html |
| 51 | PCBflipperconveyor | https://www.smthelp.net/html/PCBflipperconveyor.html |
| 52 | PCB flipper conveyor | https://www.smthelp.net/html/PCB flipper conveyor.html |
| 53 | RadialFeeder | https://www.smthelp.net/html/RadialFeeder.html |
| 54 | Wave soldering output conveyor | https://www.smthelp.net/html/Wave soldering output conveyor.html |
| 55 | SMTAxialFeeder | https://www.smthelp.net/html/SMTAxialFeeder.html |
| 56 | SMT reel tape feeder 72mm width | https://www.smthelp.net/html/SMT reel tape feeder 72mm width.html |
| 57 | S350C Conveyor 1M | https://www.smthelp.net/html/S350C Conveyor 1M.html |
| 58 | SMT_smalltubefeeder | https://www.smthelp.net/html/SMT_smalltubefeeder.html |
| 59 | Desktop robot soldering machine | https://www.smthelp.net/html/Desktop robot soldering machine.html |
| 60 | SMT GKG Printer | https://www.smthelp.net/html/SMT GKG Printer.html |
| 61 | SMTGrippernozzle | https://www.smthelp.net/html/SMTGrippernozzle.html |
| 62 | FUJI NXT M3 Mounter | https://www.smthelp.net/html/FUJI NXT M3 Mounter.html |
| 63 | AOI machine | https://www.smthelp.net/html/AOI machine.html |
| 64 | SMT PCB Loader Flipper (turn over) + conveyor w PCBA | https://www.smthelp.net/html/SMT PCB Loader Flipper (turn over) + conveyor w PCBA.html |
| 65 | SMT PCB Flipper (turn over)conveyor w PCBA | https://www.smthelp.net/html/SMT PCB Flipper (turn over)conveyor w PCBA.html |
| 66 | SMT PCB Flipper (turn over) conveyor | https://www.smthelp.net/html/SMT PCB Flipper (turn over) conveyor.html |
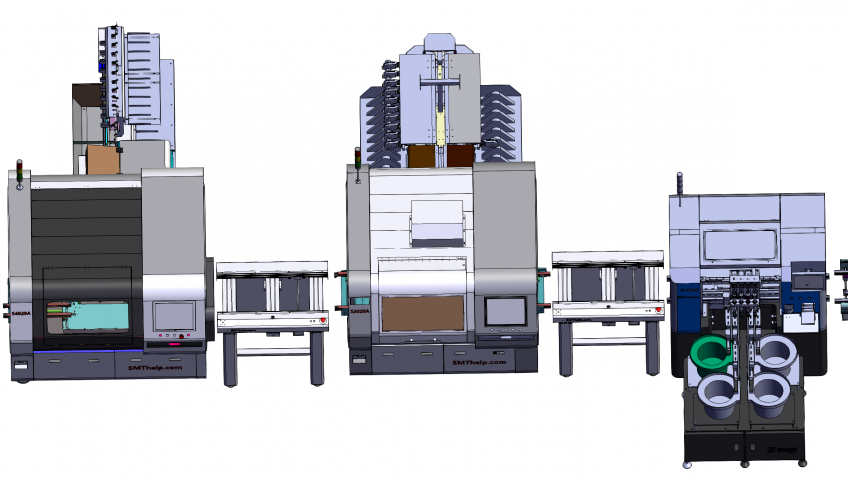

THT Auto Insertion machine
1,Auto Insertion Axial Radial Oddform Production line.html
https://www.smthelp.net/html/Auto%20Insertion%20Axial%20Radial%20Oddform%20Production%20line.html
2,SLD250+S3010A+S7040T(tray feeder)+SULD250
AI machine production line.html
https://www.smthelp.net/html/SLD250+S3010A+S7040T(tray%20feeder)+SULD250%20AI%20machine%20production%20line.html
3,SLD250 S4020A+S3010A SULD250 AI machine
production line.html
https://www.smthelp.net/html/SLD250%20S4020A+S3010A%20SULD250%20AI%20machine%20production%20line.html
4,S7000 Oddform insertion 3 bowl feeder.html
https://www.smthelp.net/html/S7000%20Oddform%20insertion%203%20bowl%20feeder.html
5,S-7040T Oddform insertion w Tray
feeder.html
https://www.smthelp.net/html/S-7040T%20Oddform%20insertion%20w%20Tray%20feeder.html
6,S-7040 Oddform insertion w 4 bowl
feeder.html
https://www.smthelp.net/html/S-7040%20Oddform%20insertion%20w%204%20bowl%20feeder.html
7,Odd form insertion Feeders w
loader-unloader.html
https://www.smthelp.net/html/Odd%20form%20insertion%20Feeders%20w%20loader-unloader.html
Feeder
1,Bowl Radial reel feeder w JUKI cart.html
https://www.smthelp.net/html/Bowl%20Radial%20reel%20feeder%20w%20JUKI%20cart.html
2,JUKI Radial tape L lead feeder .html
https://www.smthelp.net/html/JUKI%20Radial%20tape%20L%20lead%20feeder%20.html
https://www.smthelp.net/html/SMT%20tube%20feeder.html
4,SMT tray feeder -B.html
https://www.smthelp.net/html/SMT%20tray%20feeder%20-B.html
5,SMT label feeder.html
https://www.smthelp.net/html/SMT%20Tray%20feeder.html
6,SMT Tray feeder.html
https://www.smthelp.net/html/SMT%20Tray%20feeder.html
Nozzle
1,SMT nozzle list 1.html
https://www.smthelp.net/html/SMT%20nozzle%20list%201.html
2,Juki Nozzle 500 Assembly.html
https://www.smthelp.net/html/Juki%20Nozzle%20500%20Assembly.html
AI Spare Parts
1, Panasonic AI Spare parts
https://www.smthelp.net/html/Panasonic%20AI%20Spare%20parts%20list%202.html
2,UIC Radial Carrier Clip.html
https://www.smthelp.net/html/UIC%20Radial%20Carrier%20Clip.html
3,UIC Radial Feeder and Carrier Clip (1).html
https://www.smthelp.net/html/UIC%20Radial%20Feeder%20and%20Carrier%20Clip%20(1).html
4,UIC spare parts list 3.html
https://www.smthelp.net/html/UIC%20spare%20parts%20list%203.html
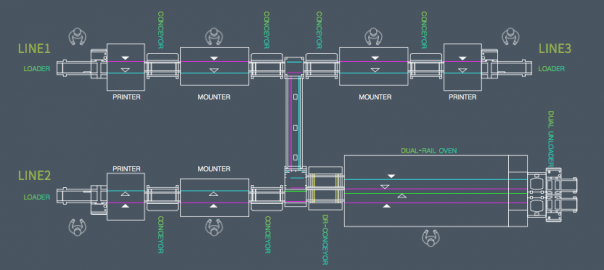
How SMT workshop planning!
And only after the plant began production found that some areas have not planned beforehand, need to be adjusted, resulting in a waste of human and financial resources and valuable production time.
Therefore, it is important to check in advance SMT factory layout, especially for new SMT factory business, because there is no experience in SMT plant layout, the need to pay attention to the elements is not very clear, if we find a problem in the layout after production point, will cause some unnecessary losses.
So, when doing layout SMT plant, what to pay attention to what matters in advance to do to prepare? Here actual cases where we work to and we explore this problem.
Case
planning SMT line configure
the client recent planning new on two identical SMT production line, specific device configuration (see FIG. 1) and the size of the apparatus is as follows: According to Figure 1 can be seen, the maximum width of the production line equipment is 1.71 m, the length of all devices sum is 13.6 meters, will add future planning a production line (line bulk on equipment configuration).
Situation Workshop
Workshop length 36 m, width of 12 m, an area of 432 m2, on the ground floor of the factory. Currently common ground for the shop floor, and no established anti-static system, can not meet the requirements of SMT antistatic workshop, but two conductive ground terminals, can establish subsequent workshops antistatic SMT system. Further, there is no air conditioning workshop and humidifiers, can not meet the requirements of SMT workshop temperature and humidity control. There workshop ventilation system, back to meet the requirements of the reflow furnace equipment. Workshop sufficient power to meet the electricity needs of all equipment in the workshop. There are two entrances whole plant, as are required to meet the equipment, raw materials and semi-finished channel. Special materials warehouse in another workshop, the need for planning. Good lighting conditions in the workshop, to meet the brightness of the SMT shop lighting requirements all stations. Whole plant layout situation shown in Figure 2.
Customer requirements
1, the current new move into production lines and related aids, regional positioning;
2, the whole plant to meet future erection and production requirements three production lines, without planning zone realignment;
3, each production line starting position as consistent as possible, so that the whole plant orderly arranged in three lines.
Subject of
analysisthe customer’s request, we first analyzed how the production line positioning; and before locating the production line, we consider the following points:
1, SMT equipment should avoid column and they maintain a certain distance, the distance is equipment installed at least after a good feed material by a vehicle;
2, SMT crossing equipment required for frame division pitch, and the crossing equipment to extend outwardly after the device installed above the material 50 cm;
3, optimal spacing of the two lines spaced more than 1.2 meters between the outer frame;
4, check the wire tail is generally a repair plan area, quality control personnel can perform sampling line tail region.
Based on the above considerations, the length of each line should be at least 13.6 meters (without regard to the maintenance area and the tail, the case where the sampling area and the thread area kanban), the width should be 2.7 meters (SMT feeding both surfaces), specifically as shown in Figure 3.
Therefore, the production line is positioned in substantially considering plant shown in FIG. 4.
Some details of the requirements of SMT plant layout
after determining the approximate location of the production line, when the need to consider some details of SMT production line requirements, and then to determine the exact location and the location of other auxiliary equipment SMT line.
First, we analyzed the SMT line position and aids required for each area requirements: 1, fire extinguisher drop zone;
fire extinguishers to be placed around the side of the post and SMT plant, placed according to the requirements of fire regulations.
2, the car rack placement region; car rack replacement for SMT production line models and switching material, in order to facilitate production and to improve the efficiency of replacement materials, preferably the vehicle is placed near the rack placement machine.
3, stock units rest area;
stock table mainly used in the production process and dryer materials stock preparation before switching, therefore, to be placed near the preparation station placement machine, and the best car rack together, Preparation facilitates directly on the car frame after a good feed material.
4, the shelf rest area printing station;
printing station for positioning the shelf aids in the production of printing presses, such as wipes, paste, alcohol, etc., to be placed in the vicinity of the printing press to facilitate removal use, improve Productivity.
5, placing solder paste regions;
region comprising placing solder paste storage refrigerator, solder paste mixer, paste warmed cabinets, can be placed next to the plant as required or uprights placed around a fixed area of the plant, However, to facilitate the operator to take place.
6, visual inspection after the furnace area, maintenance area;
in order to facilitate visual inspection after reflow and rework semifinished product, a shelf generally placed in the furnace, designed for the visual inspection of the furnace and rework.
7, screen placement area;
drop zone comprises a mesh screen plate was placed cabinet, stencil cleaning machine, inspection tools, screen, stencil for storing, cleaning and inspection screen tension, etc., while in the region as much as possible to facilitate the production screen to take place.
8, garbage drop zone;
Production waste mainly from two parts, wipes and the like used in one printing operation, the second is to replace the waste tray and waste material produced with the like. Garbage two parts is generated to be placed separately, specialized recycling, in particular waste presses used. Thus, waste area may be placed next to the press machine or patch, or set beside the column region refuse placed separately placed.
9, kanban placement region;
kanban including the SMT billboards and other signage quality management, may be centrally located on the entrance into the shop, and also set up the production line Kanban state in which each head of the line, in order to view the producers and managers, promptly understand the current state of production status and quality SMT workshop and so on.
10, product placement area;
include products produced finished products in two parts, to separate the two partial regions divided out, strictly distinguished, in order to avoid confusion.
11, SMT placement of spare areas;
Nozzle including the SMT spare parts, a motor, a belt, cylinder or the like, to be placed in a special area, to facilitate the production of access.
12, location area temperature and humidity;
temperature and humidity conditions in order to better understand the SMT plant, depending on the size of the workshop area, several appropriately set the temperature and humidity measurement area, generally placed on the production line next to the column or wall.
13, SMT workshop office area;
let engineers and technicians and management personnel in office SMT shop floor, which can solve the problem on technology and management encountered in the production, to ensure the smooth operation of the SMT production lines.
14, anti-static protection area;
entry into SMT workshop area must have good anti-static measures. You may delineate the area in front of the plant, including the replacement of static clothing, shoes, hats and so on each employee’s locker. Also, the establishment of regional designed to test the static ring in SMT workshop at the entrance, so that each employee to do static loop testing and record test results before going to work. Based on the above analysis, the results of this SMT plant layout is shown in Figure 5.
In addition, SMT workshop also meet other requirements: 1, anti-static processing;
shop floor must be anti-static treatment, a common anti-static conductive flooring and paint and other ordinary places, customers can choose according to the actual situation. In addition, anti-static system must be set up in the workshop, to meet the requirements of the entire anti-static SMT workshop.
2, air-conditioning and a humidifier; SMT workshop to meet the requirements of temperature and humidity control.
3, the material management requirements;
in the warehouse, with particular attention to the way the material is stored, reel packaging methods, the use of hook-type place, wetting elements employed Cabinets for placement shelves to be treated with anti-static manner.
4, patch equipment gas and electrical circuitry;
preferably introduced directly from the production line at the down side of the roof, is arranged below the gas passage in the device and circuit wrapped with wire groove.
5, the ventilation system requirements;
needs to be installed to meet the requirements of the three power lines of the blower, and the third exhaust port reserved line.
Results
1, according to the size of production line and the size of the entire plant SMT, completed the reasonable position of the production line; and
2, for aids, regions, etc. SMT production lines need to make the corresponding position location; 3, according to the SMT the characteristics of the plant, some of the necessary factors to consider in planning, in particular, anti-static; 4, in accordance with the requirements of the current situation and future development of the factory has been take into consideration, unified planning.
Summary
For SMT plant layout, but also requires a combination of size and product requirements and other plants to consider a number of factors, but to stimulate here.
Welcome inquiry
1,Please visit : www.smthelp.com
2, Find us more: https://www.facebook.com/autoinsertion
3, Know more our team: https://cn.linkedin.com/in/smtsupplier
4, Welcome to our factory in Shenzhen China
5, See more machine working video, please Youtube: Auto Insertion
6, Google: Auto+insertion, to get more informations
7,Looking forward to your email: info@smthelp.com
https://docs.google.com/document/d/e/2PACX-1vSFUaow2vtLCQbtVShngWxA2uiLkcv6i4BKn4ORhsatobh8Ah_ONk2bFfjkAOSsZf3yKfBrj2hULMi0/pub
PCB Unloader \loader and Destacker from production to packaging.
1. Purchase all kinds of materials according to order.
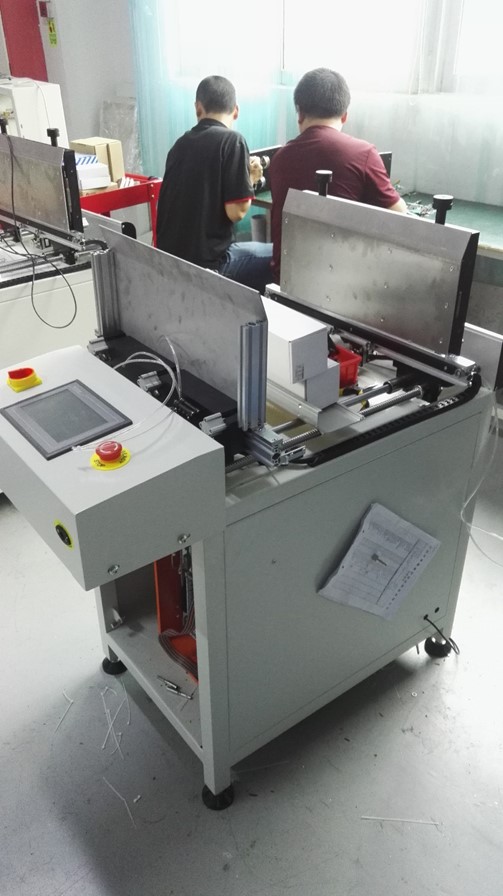
2. Frame installation of the entire machine.

3. Installed power motor
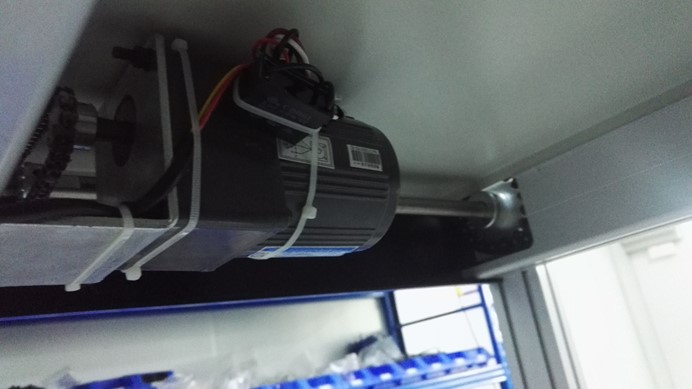
4. Install PLC control box.

5. Install sensor and belt.

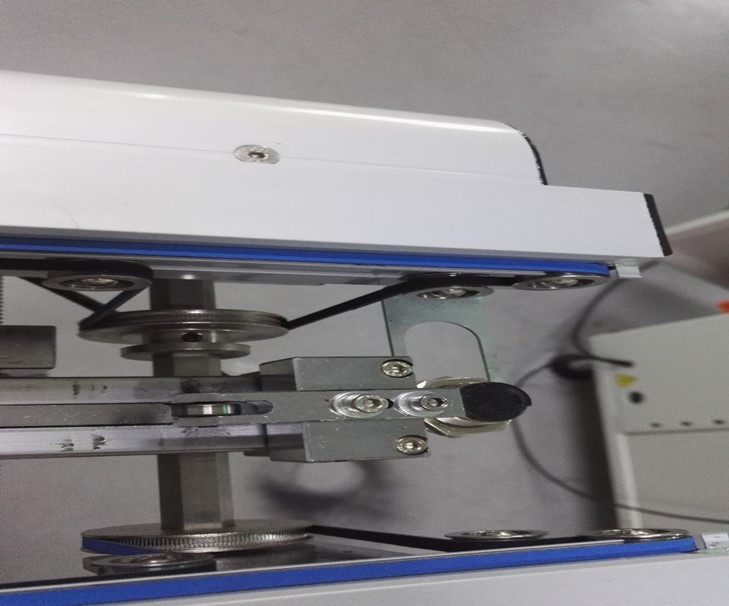
6.Install the cover
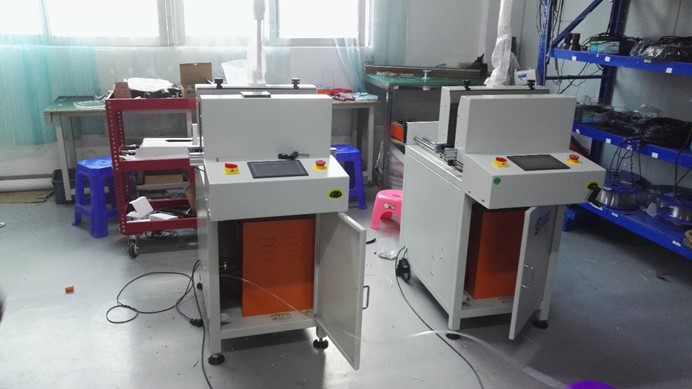
7.Install the LOGO

8. Install the program and test the machine.

9 .Use PCB board to test machine.
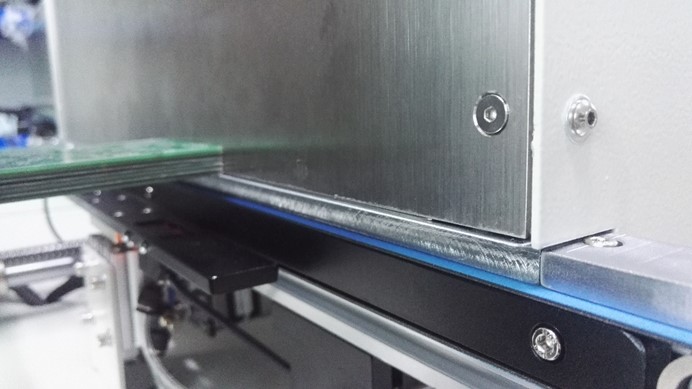

10.Use a magazine test machine.
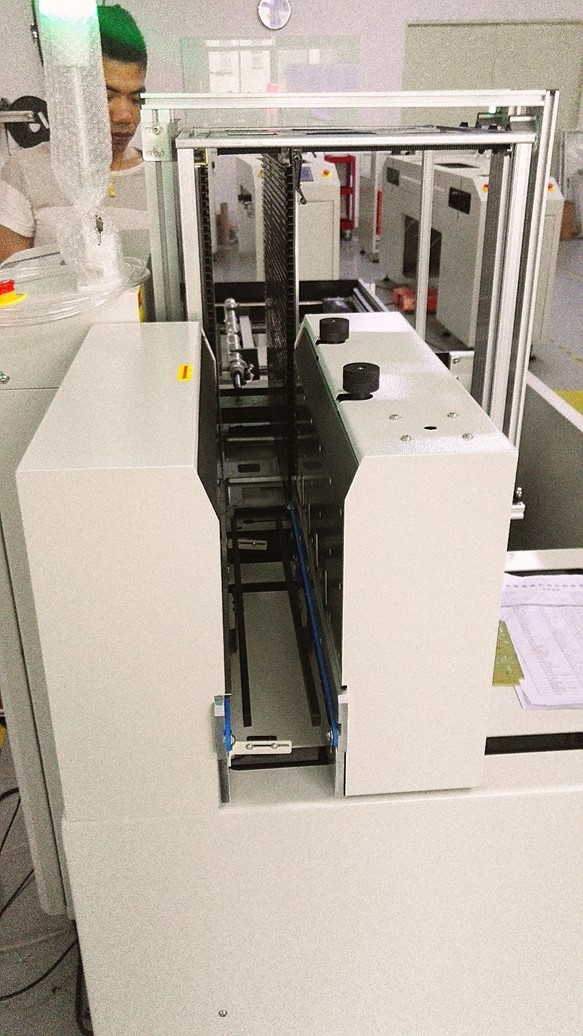
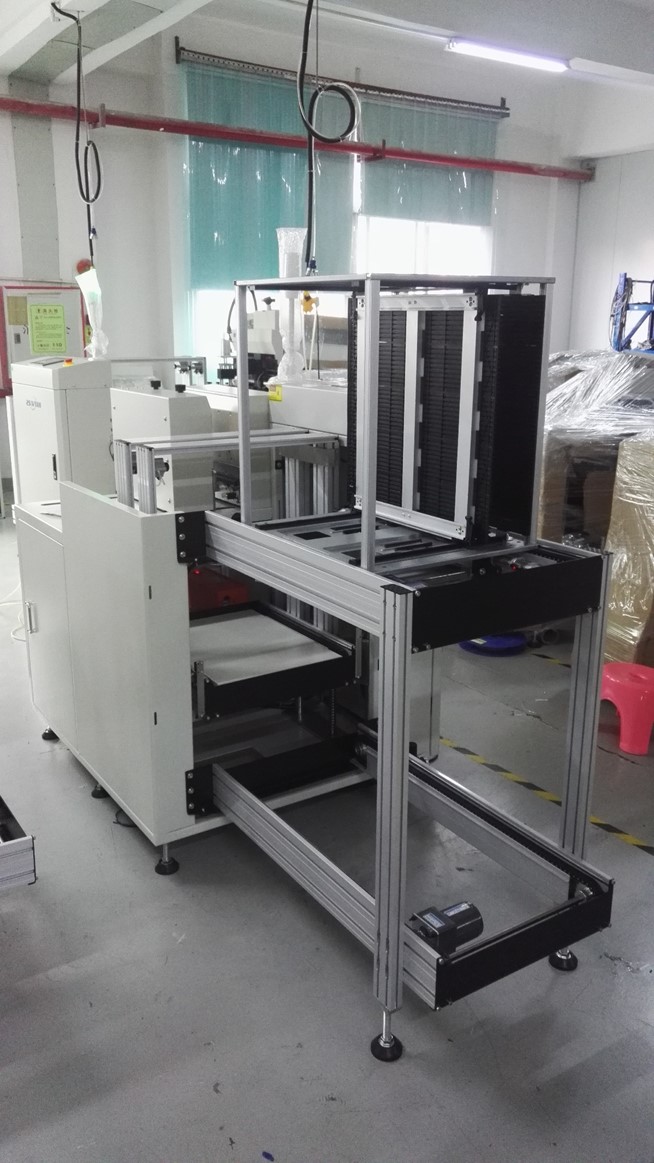

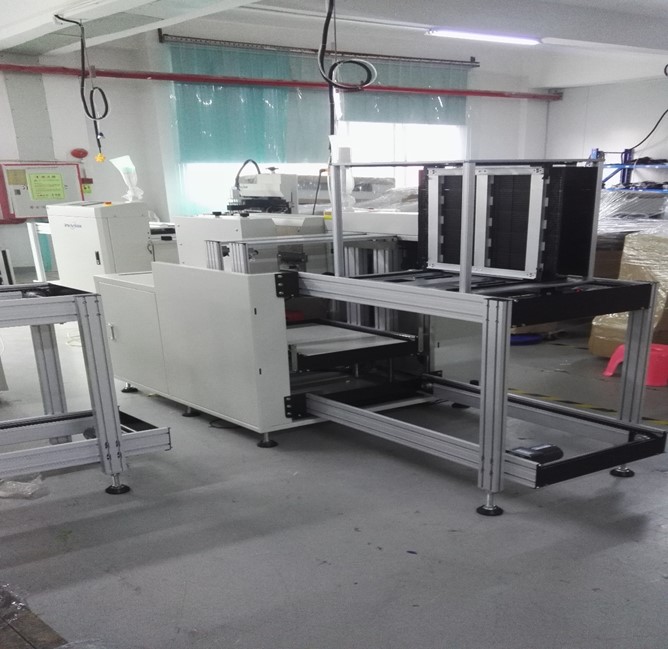
11. Aging operation week

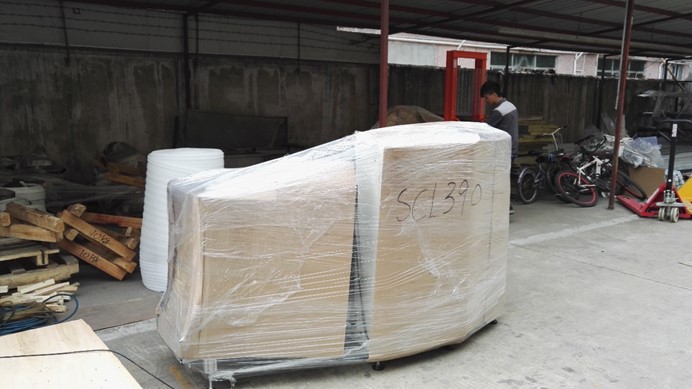
12. Simple packing before shipment.

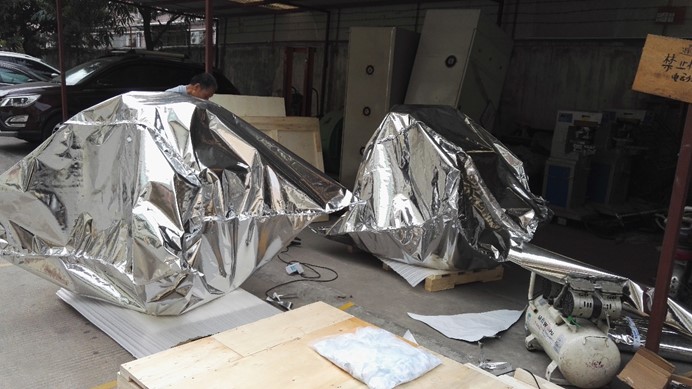
13. On the day of shipment, use the export wooden box vacuum packing,


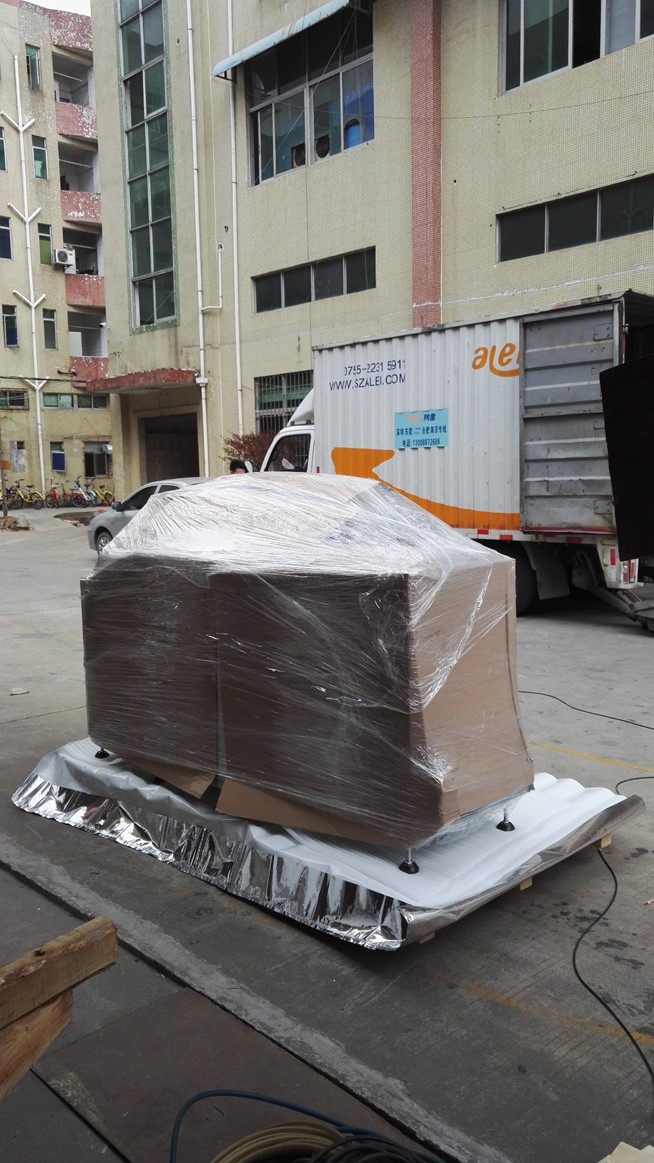

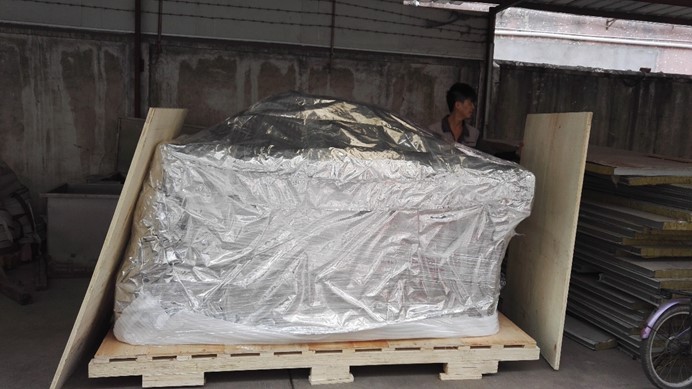


14. Arrange forwarders to pick up the goods.


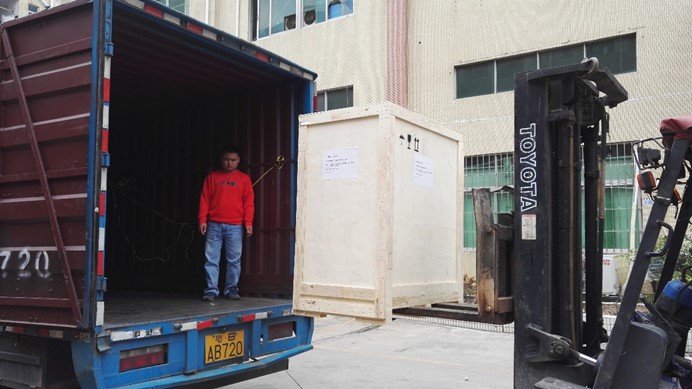
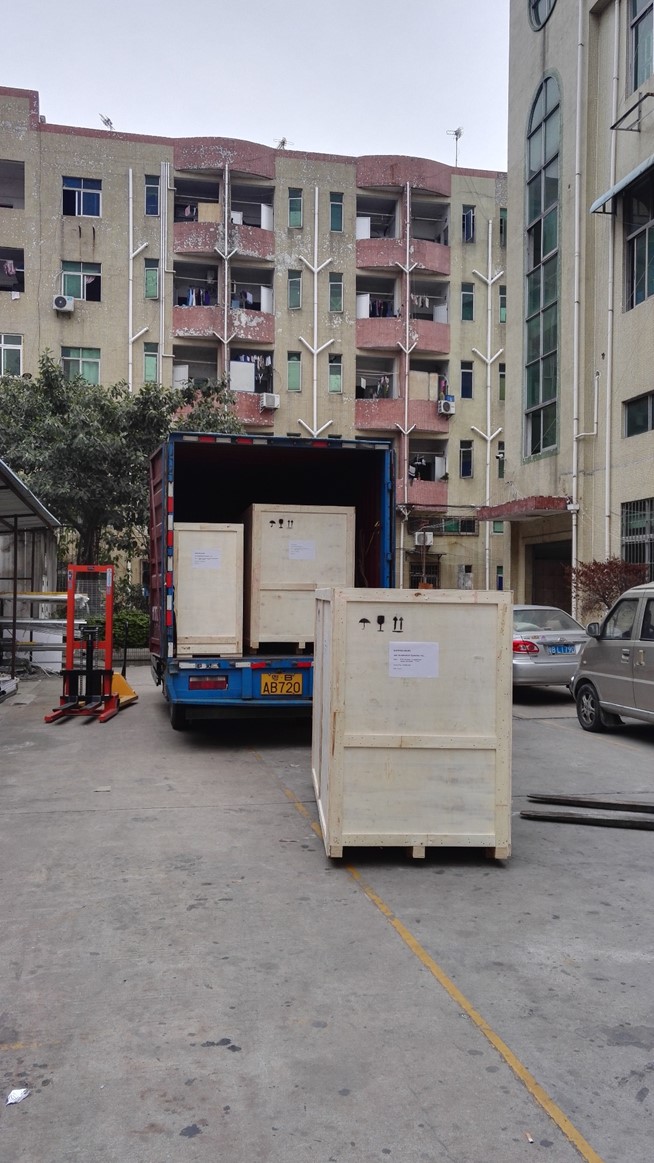
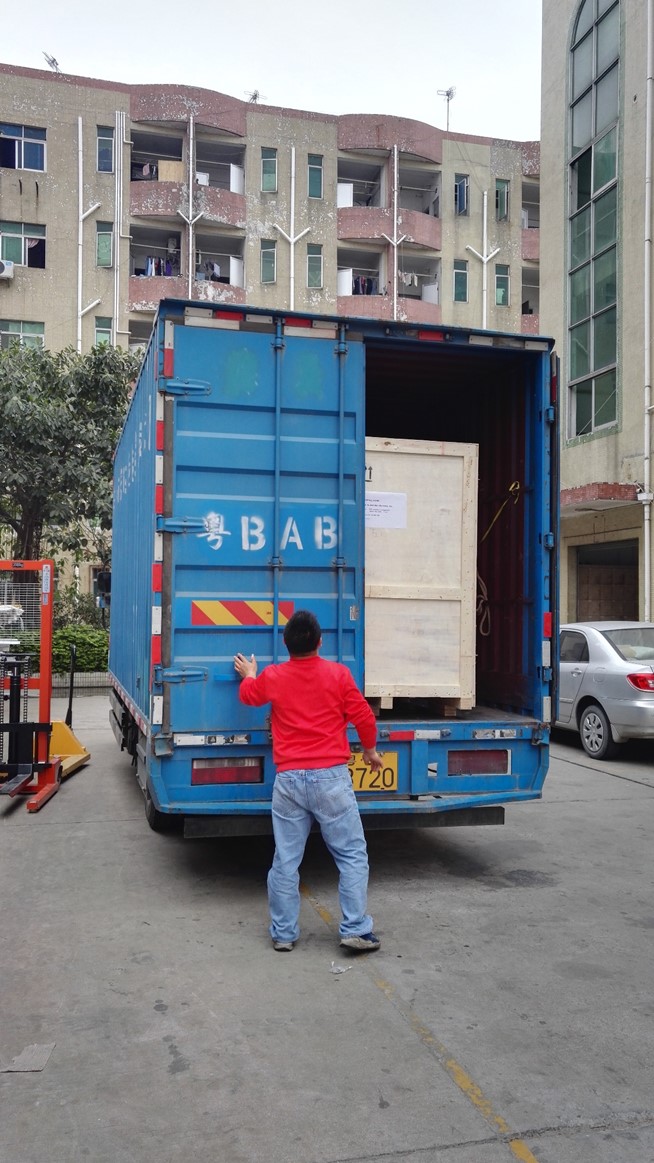

Four machines were shipped and shipped to the United States via freight forwarders.
ming@smthelp.com
S-CC200 User’s Manual for Part Counter
Index
三、Chip bonder counter function key and operating instructions… ………………………………………………. …4
四、Chip bonder counter connecting printer operating instructions (Option) ……………………………… …………6
五、Trouble Shoot……….…………………….……………….8
六、After-sale service……………………………………….9
七、After-sale service card………….……… .. …………………..10
一、Introduction
1、Theory
Chip bonder counter can precisely count the SMD quantity, by adopting optical and electric sensor theory, using the corresponding relation between guide hole on the carrier and part, and by the special die and massive integrated circuit, chip bonder counter achieve zero error, and achieve convenient, quick counting, it is an effective auxiliary equipment for managing SMT material.
2、Product features
With full automatic way figure part quantity, it is convenient to count and delivery material. Easily operate it, original design defending strip dropping off decrease strip hurt to a smallest extent. It can count in forward direction or in backward direction, and it can be preset value, precisely figure out quantity with zero error. You also can install scanner gun and barcode printer, which is more convenient for managing operation..
3、product specification
Power: AC220V,50/60HZ,25W
Counter range: -99999–99999PCS
Profile size: L470W300H180mm
Weight: 10KG
4、Product Utility
Suit for SMD strip type of part
Strip wheel diameter: suit for any size
Strip pitch: 1,2,4,8,10,12,16,24,32,44,56mm ( Note: if pitch is smaller or wider, make it according to customer’s request)
Strip width: 4,6,8,12,16,24,32,44,56mm (Note: if width is smaller or wider, make it according to customer’s request)
5、Product Structure
this product have two types.

2) S-CC202 inspecting missing type chip bonder counter

1、material reflector
2、Tray
3、Gear/motive pressing plate
4、monkey wrench
5、rocket head
6、free movable shoulder
7、location knob
8、display
9、key
10、power key
11、handle
12、glass fiber amplifier
13、glass fiber head to head emitter
二、Chip bonder counter attention
1,After unpacking, please count and make sure all accessories ready.
2,Before using chip bonder counter, please carefully read operating instructions and safe keeping.
3,Please check whether voltage specification conform to the electric supply.
4,Please check grounding properly, and guarantee safety of human body and part.
三、Chip bonder counter function key and operating instructions
1、Function key introduction
1)”PRINT”
Operation way: enter the key, you can print the counting part and quantity on the barcode by the barcode printer.
2)”SET”
Operation way: if the display shows 00000 in the left bottom, you can directly press the number key to input the counting part quantity; press the SET key one more time, the machine switches to manual mode, and the display shows ***** in the left bottom. Switch to manual mode or automatic mode using this key. (note: under automatic mode, you can preset a value before counting material, when machine turn to the presetting value, it will automatically stop, under manual mode, only if you press ” stop/zero clearing” key or it finishes all material, the machine will stop.)
3)”PITCH”
Operation way: after pressing this key, the pitch value in the display will flicker, then you can input the pitch value and press “ENTER” key, if no press after 5 second, automatically memorize, the machine will resume to standby status after one ticking sound.
4)”RIGHT” “FOREWARD/RIGHT”
Operation way: Pressing this key, start clockwise counting part, the numerical value is positive number, “BACKWARD/LEFT” on the contrary.
5) “STOP/ZERO CLEARING”
Operation way:
(1)Under counting or feeding back status, press this key, it will stop counting or feeding back.
(2)If under standby status, press this key over 2 second, the counting value will be cleared up.
(3)If under printing interface, press this key, return to main interface.
6)”SELECT”, this key is switching key for setting parameters in printing interface.
7)LCD display
 Set pitch
Set counting quantity part quantity
display*****under manual mode
8)”Time/missing stop” key is switching key for motor rotating speed, press this key, LCD display will show motor speed will be switched among H(high speed), M(middle speed), L(low speed).
2、 Operation Flow
1)Connect the power cable to the master machine, and plug the AC220V power.
2)Turn on the POWER key on the panel of machine, at this time, LCD panel become light
3)Press PITCH key, set the pitch between counting parts, then Press “ENTER”, and put the part on the left tray.
4)Manually pull out the strip and put it between material guard plate and counting gear, make the first part and blank middle hole aligning the middle line of material guard plate.
5)Press “STOP/ZERO CLEARING” key for 2 seconds, make the value zero clearing. Note: when pulling the strip, counting gear will turn and count, pressing this key, make the value zero clearing.
6)Press “SET” key to switch to manual mode or automatic mode, when you select automatic mode, you should input a value which you are going to count, or the “FORWARD” motor won’t start.
7)Pull strip coiling to the blank tray (right tray) by your hand, press “FOREWARD/RIGHT” to begin counting.
8)When finishing preset value, motor stop. Impacted by the inertia theory, counting number may be more one or less one than the set number,
9)When finishing counting, press “BACKWARD/LEFT”, strip will coil back to the left tray, after finishing, rotation will stop.
四、Chip bonder counter connecting printer operating instructions (Option)
1、Check equipment
1)Connect part counter and barcode master machine
2)Correctly place the barcode paper in the printer
2、 adjust and test equipment
1)Start power switch of the part counter
2)Start bar code master machine power switch: power pilot light and ready pilot light are on, at moment, press FEED key of bar code master machine (automatic aligning key), make the paper automatically align. ( P.S: if power light is flickering, it denotes the machine is off line, please restart power or repress FEED key)
3、Print
Press “PRINT” key in the master interface, master interface will display printing interface, the first row in the interface show: company name (you can set it by yourself); the second row show: time, the last row show printing operation.
Note: Saving the content in the editing row, only when cursor is in this row, and then press ENTER, the content can be saved. For example, if you want to save the content in the first row and second row, when cursor is in the first row, you press ENTER key, at the moment, only the content in the first row is saved, the content in the second row can’t be saved.
Tag: when scanner scans barcode, it will display in the printing interface, press PRINT key to print.
五、Easy trouble shoot
| Failure | debug method |
| After turning on power, LCD no display, buzzer no sound | Please check if power cable drop off or fuse loosen |
| 。After turning on power, LCD no display, buzzer sound | LCD display cable loosens or breakdown, please check or contact dealer to change. |
|
LCD normally displays, but FOREWARD/BACKWARD can’t be started. |
|
六、After-sale service a: (overall unit maintenance period for one year, master controller board maintenance period for three years, and tended for all life.) the following state happened is not in the free maintenance condition.
After-sale service card

 User’s Name: Address:

 Machine model: User’s phone number:

 Purchasing Date: Dealer’s seal:
User should know that:
(1)Due to wrong operating, carelessly using, natural disaster cause the machine damaged.


