

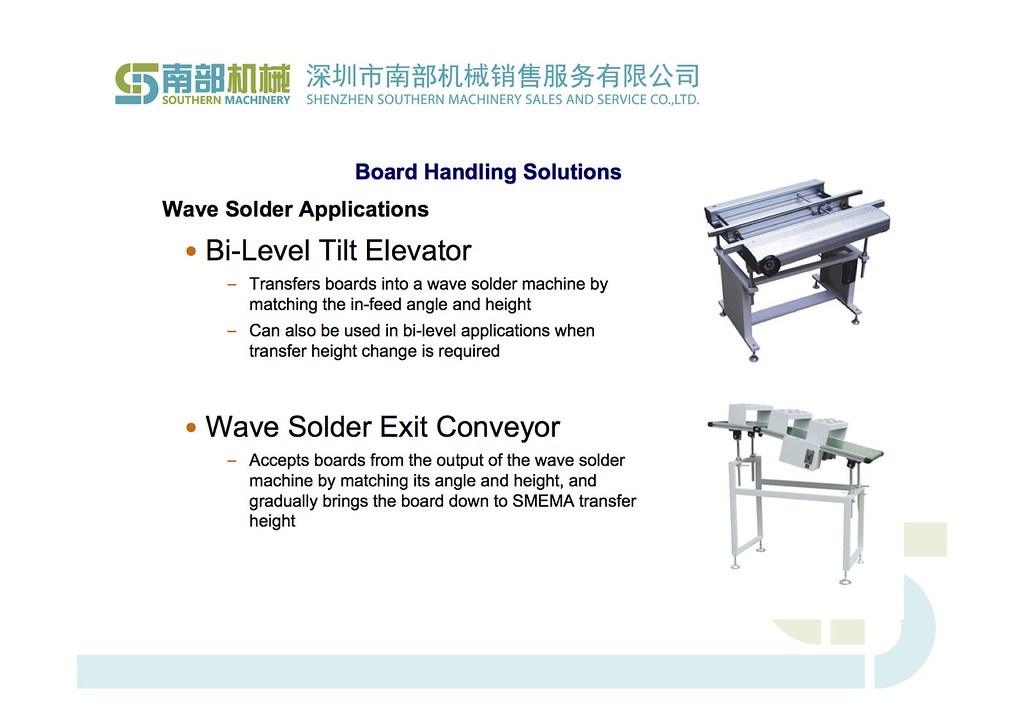
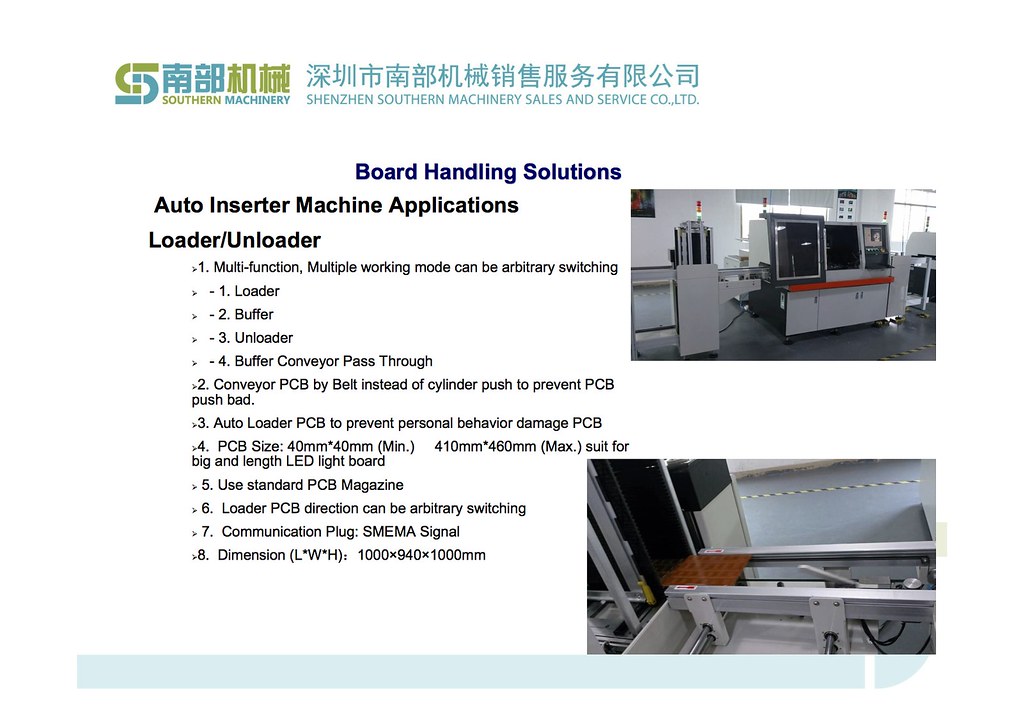
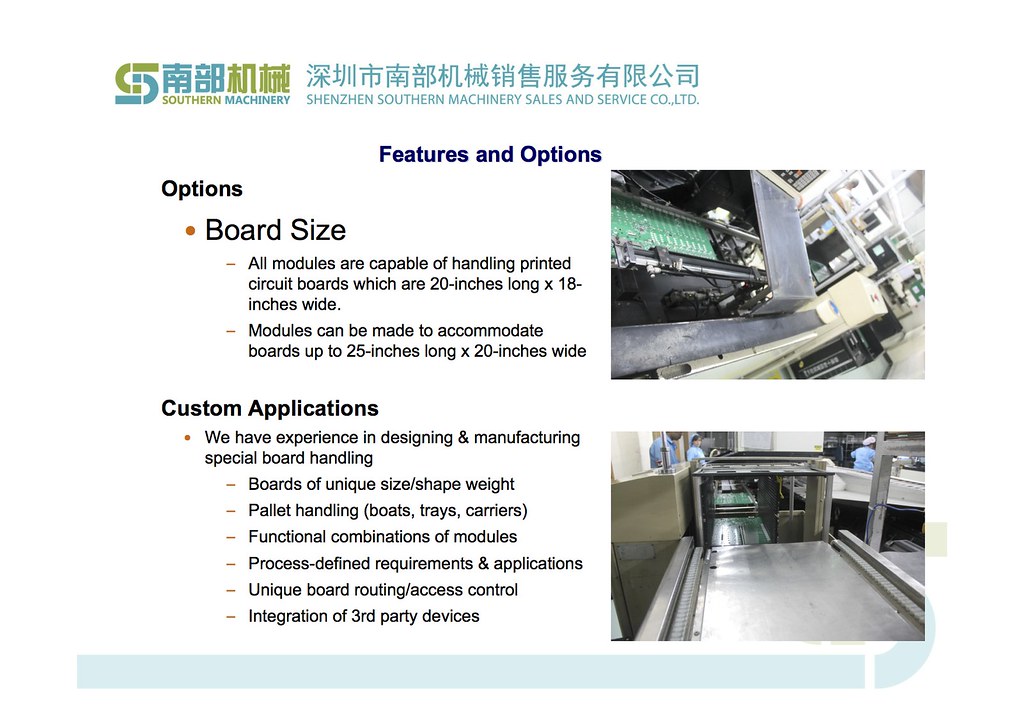
Southern Machinery provides professional SMT peripheral equipment

Comparative Matrix of Universal Radial 8XT & the Panasonic RHS2 and RHS
|
Feature |
Universal Radial 8XT |
Panasonic RHS2 |
Panasonic RHS |
| Insertion Rate | 20,000 CPH | 18,000 CPH | 14,400 Maximum
|
| Tact Time | 0.18 sec Constant Speed | 0.2 sec Maximum (0.25 sec for the component with 12mm diameter and 18mm height or bigger) | 0.25 sec Maximum (More time may be required for components with 12mm diameter and 18mm height or larger) |
| 4 Axis Insertion | Yes, the insertion head can rotate in four directions: 0, -90, +90, and 180 degrees. | Yes, the insertion head can rotate in four directions: 0, -90, +90, and 180 degrees. | Yes, the insertion head can rotate in four directions; 0, -90, +90, and 180 degrees. |
| Rotary Table | Yes, 90 and 180 Degree Increments | No – Head Rotates 3600 | No – Head Rotates 3600 |
| Insertion Span | 2.5/5.0mm Dual Span
2.5/5.0/7.5 Triple Span |
2.5/5.0mm | 2.5/5.0mm |
| Maximum Body Diameter/Height (Height measured from center of feedhole to top of component.) | 13.0mm/38.5mm | 13mm/39mm | 13mm/38mm |
| Board Handling Transfer Time (from “pins up” to “pins down” | 2.5 seconds | 4 to 5 seconds | “About 3 seconds” |
| Maximum Board Size | 559 x 470mm (NPT)
483 x 406mm (PT) |
508mm x 381mm | 508mm x 381mm |
| Insertion Area | 508 x 470mm (NPT)
483 x 406mm (PT) |
508mm x 371mm | 508mm x 381mm |
| Allowable PCB Thickness | 0.79mm to 2.36mm | 1.6 +/- 0.15mm standard
The RHS II can accommodate a range of 0.8 to 2.0mm, however the PCB transfer rails must be changed for PCBs with nonstandard thickness. This is an option. Even when using the standard 1.6mm thick PCB, there are chances of lead length/angle variation which causes PCB transfer error depending on the shapes of boards and/or insertion holes. |
1.6 +/- 0.15mm standard
The RHS can accommodate a range of 0.8 to 2.0mm, however the PCB transfer rails must be changed for PCBs with nonstandard thickness. This is an option. Even when using the standard 1.6mm thick PCB, there are chances of lead length/angle variation which causes PCB transfer error depending on the shapes of boards and/or insertion holes. |
| PCB Warpage | Maximum of 3.17mm downward and 1.6mm upward | Maximum of 1.2mm downward and 0.5mm upward | Maximum of 1.2mm downward and 0.5mm upward |
| Part Transfer Method | Sequencer | Sequencer | Sequencer |
| Number of Input Stations | 20, 40, 60, 80, 100 | 80 | 80 |
| Component Supply | Reels or ammo packs on any input. | Reels or ammo packs. Reels can only be used on the lower input bank | Reels or ammo packs. Reels can only be used on the lower input bank. |
| Component Taping Pitch | 12.7/15/25.4**/30mm** | 12.7/15.0mm | 12.7/15.0mm |
| Odd Form Component Insertion | Yes, at a constant rate of speed | Yes, but at a derated insertion speed, dependent on component shape/size. | Yes, but at a derated insertion speed, dependent on component shape/size. |
| Verification | Yes, value polarity. | No | No |
| Board Error Correction | Yes, Standard | Yes | Yes |
| Low Part Warning | Yes, Standard | No | No |
| Insertion Density | Tooling effects footprint. | Tooling effects footprint. | Tooling effects footprint. |
| Auto Recovery | Yes – Semi-Automatic | Yes – Interrupt Recovery Enabled (Automatic supply recovery function) | Yes – Interrupt Recovery Enabled (Automatic supply recovery function) |
| Component Replenishment | Any disp.head location can be spliced w/o stopping the machine. | Although this is a sequencer based machine, when a feeder is low on components, that feeder and the two adjacent feeders must be turned off before reloading or splicing additional components. If during the reloading process the machine requires components from those three feeders, the machine stops until the reloading process is completed by the operator. | |
| Uninterrupted Power Supply | Standard. When the UPS detects a power interruption, its fully-charged battery can run the machine for up to 10 minutes. | No | No |
| Language | English is the main language, however Chinese, French, Hungarian, Polish, and Spanish are available for event messages. | Japanese/English | Japanese/Chinese |
| Machine Dimensions | 80 Stations (In-line):
W = 5428mm D = 3226mm H = 1746mm
80 Stations (Straight Back): W = 1800mm D = 6397mm H = 1746mm |
80 Stations:
W = 3125mm D = 2210mm H = 1560mm |
80 Input Stations:
W =Inches (3125mm) D = Inches (2210mm) H = Inches (1560mm) |
| Marketing Evaluation | 3 years with more than 350 installed Radial 8 A machines worldwide, good public support. The Radial 8 XT is built on the same platform. | Brand new machine without marketing evaluation | Initial evaluations indicated that the machine was fragile, and required significant repairs. This led to the introduction of the RHS II within 1.5 years. |
IM Component Lead Hole Specifications
Component Lead Hole Specifications
PC boards should be punched for component lead insertion to the following recommended hole diameters.
HOLE DIAMETER = LEAD MAXIMUM DIAMETER (φd for round leads, φd3 for rectangular leads) + 0.483 mm
(0.019″) ±0.08 mm (0.003″)
Hole sizes less than the recommended size may result in a degradation of insertion reliability while holes that are greater than recommended may result in loose components in the printed circuit board.
Unguided leads require larger hole-to-lead relationships. For triangular or in-line layout (such as potentiometers and SIPs), PC boards should be punched for the unguided lead(s) to the following recommended hole diameter.
HOLE DIAMETER = MAXIMUM LEAD DIAMETER + 0.584 mm (0.023″) ±0.08 mm (0.003″)
Note:
For maximum lead diameter, use φd for round leads and φd3 for rectangular leads. (Refer to the notes for “Two- Leaded Component Specifications” for definitions of φd and φd3.)
For further considerations and examples of lead-to-hole relationships, see the Cut and Clinch sections of this GS for the particular cut and clinch desired.
Holes used for board error correction should be 1.0 mm + 0.5 mm (0.040″ + 0.020″). Plated holes or translucent PCBs may affect performance.
Recommended Lead Hole Span
Dual Span Machines
Insertion performance is maximized by considering the jaw tooling design when laying out the PC board hole patterns (the jaw clamps secure the component leads against the fixed surfaces of the jaw guide). In order to achieve the best results, the insertion hole spans in the PC board should be designed at 2.54 mm (0.100″) (for 2.5 mm components), one lead diameter plus 4.5 mm (0.177″) (for 5 mm components). Use the following table for a reference.
|
2.5mm |
5.0mm |
||
|
Lead Diameter |
Recommended Lead Hole Span |
Lead Diameter |
Recommended Lead Hole Span |
| 0.36 mm (0.014″) | 2.34 mm (0.092″) | 0.36 mm (0.014″) | 4.85 mm (0.191″) |
| 0.41 mm (0.016″) | 2.37 mm (0.094″) | 0.41 mm (0.016″) | 4.9 mm (0.193″) |
| 0.46 mm (0.018″) | 2.44 mm (0.096″) | 0.46 mm (0.018″) | 4.95 mm (0.195″) |
| 0.51 mm (0.020″) | 2.49 mm (0.098″) | 20.51 mm (0.020″) | 5.0 mm (0.197″) |
| 0.56 mm (0.022″) | 2.54 mm (0.100″) | 0.56 mm (0.022″) | 5.05 mm (0.199″) |
| 0.61 mm (0.024″) | 2.59 mm (0.102″) | 0.61 mm (0.024″) | 5.11 mm (0.201″) |
| – | – | 0.66 mm (0.026″) | 5.16 mm (0.203″) |
| – | – | 0.71 mm (0.028″) | 5.21 mm (0.205″) |

Note:
These dimensions apply only to holes for leads that are captured by the insertion tooling. All remaining holes should be drilled according to component manufacturers’ specified spacing requirements.
Tooling selection matrix for through hole machines
Tooling selection matrix
for through hole machines
Axial VCD/SEQ and Single Head VCD Tooling (6241F)
| Tooling | Min wire size | Max wire size | Min hole span | Max hole span | Comments |
| 5.0mm | 0.015” | 0.032” | 0.197”
(5.0mm) |
0.850” | – 5.0mm insertion capability
– Shorter driver tip life than standard, 5.5mm or large lead tooling |
| 5.5mm | 0.015” | 0.032” | 0.216”
(5.5mm) |
0.850” | Improved driver tip life versus 5.0mm tooling. |
| Standard | 0.015” | 0.032” | 0.300” | 0.950” | |
| Large lead | 0.025” | 0.042” (copper)
0.032” (steel) |
0.300” | 0.940” | -Will not run wire smaller than 0.025”
– Has slightly larger footprint than standard or 5 mm tooling |

Axial Dual Head/ Single Head 8 Tooling
| Tooling | Min wire size | Max wire size | Min hole span | Max hole span | Comments |
| 5.0mm | 0.015 | 0.032 | 0.197 (5.0mm) | 0.783 | – 5.0mm insertion capability
– Shorter driver tip life than standard, 5.5mm or large lead tooling |
| 5.5mm | 0.015 | 0.032 | 0.216
(5.5mm) |
0.783 | Improved driver tip life versus 5.0mm tooling. |
| Standard | 0.015 | 0.032 | 0.300 | 0.883 | |
| Large lead | 0.025 | 0.042” (copper)
0.032” (steel) |
0.300 | 0.873 | – Will not run wire smaller than 0.025”
– Has slightly larger footprint than standard or 5 mm tooling |
Axial VCD/SEQ Clinch Tooling (6241F), Axial Single/Dual Head 8 Clinch Tooling
Only “standard” continuity tooling is offered, this tooling handles 5mm through maximum insertion span
Tooling may be adjusted to yield 45 through 90 degree clinch angles
Tooling selection matrix
Radial 8 Head Tooling
The Radial 8 is equipped with 13.0 mm (max component body diameter) head tooling as a standard feature.
The Radial 5 offered two types of head tooling, 10.5mm and 13.0mm. Since the 13.0mm tooling can handle larger components and the only drawback is a very small footprint increase of 0.33mm (0.013”), the 10.5 mm tooling was dropped as a standard offering on the Radial 8. This change has simplified the ordering and manufacturing processes.
Radial 8 Clinch tooling
Three different styles of clinch tooling are offered to address the highly varied requirements of our customers.
| Tooling | Pro | Con | Comments |
| “N” 90 degree short | Short finished clinch length works well for high density applications | Hole diameter versus wire diameter must be properly controlled to yield a tight clinch | N 90 degree long and N 90 degree short account for over 90% of machines sold. |
| “N” 90 degree long | Tight clinch is possible even when using large hole diameters | Higher chance of solder bridging or other density issues | Both N style clinches have very few adjustments |
| “T” style | Lead length may be adjusted to suit customer/product | More adjustments than either “N” style clinch | PC boards are usually designed to use either N or T style tooling exclusively. |

98-056b revised 1-00
PC Board Design Checklist For Through Hole Components
PC Board Design Checklist
For Through Hole Components
This document should be used as a supplement to existing machine General Specifications and IM Design Guidelines. This document is designed as a checklist rather than a reference for use when examining an existing or new product. For detailed specifications refer to the appropriate General Specification.
PC board considerations
For Axial or Radial auto insertion:
Is the overall size of the board within specification? (max/min size varies by machine and board handling type)
Is the board thickness within specification?
Possible challenges:
Radial can accept boards from 0.032” to 0.093” thick with no set up change, axial machines require mechanical adjustment to handle thickness variations.
If using automatic board handling, is the board shape acceptable? (i.e. contiguous edges.)
Possible challenges:
Non-contiguous edges, may work but requires testing. Example, instrument cluster.
Is the board a good candidate for panelization? (i.e. creating multiple images of the same board on one panel for ease of assembly and increased throughput.)
Is the board warpage within specification?
Possible challenges:
Warpage can cause issues with insertion as well as clinch angle/length, especially on radial machine.
Does the PC board contain location reference holes to allow proper fixturing?
Possible challenges:
If product was previously hand assembled it may not have locating holes.
Are the components positioned at 0º and/or 90º with respect to the X axis?
Possible challenges:
Sometimes components are arranged at odd angles because of space constraints or because designer wanted to keep component body straight. (example: ECCO board.)
Are the component hole diameters within specification for each component type (lead diameter) being inserted?
Possible challenges:
Boards currently hand assembled are most likely to have undersize holes.
Is there sufficient clearance below the board for the clinched component leads? Consider the following:
Solder bridging to other component leads
Solder bridging to via holes or adjacent pads
Note: Universal does not specify required clearance to prevent solder bridging, this should be determined by the customer. However, obvious cases of conflict should be noted.
Is there sufficient clearance for the insertion and clinch tooling? Take into consideration:
Previously inserted IM components
Previously placed SM components
Workboard holder locating and support fixtures
Obstructions on the bottom of the board that could interfere with the clinch or board transfer.
Component and tooling considerations
Axial
Are components packaged properly for automatic insertion? (Tape and reel/ammo pack)
Possible challenges:
Customer may have “sample” components in bulk, are these components readily available in a taped format?
Is the component input tape width (i.e. 26mm or “standard”) compatible with the component hole span?
Possible challenges:
Universal does not offer a machine that can accept 26mm input. Virtually all components are available in 52mm format, however, a subcontractor may have to deal with “kits” from an OEM that contain 26mm components.
Is the insertion tooling (i.e. 5mm, 5.5mm or standard) compatible with the component hole span?
Possible challenges:
Does the product include both very wide and very narrow span components? Use tooling selection matrix to evaluate best tooling fit.
Is the component hole span compatible with the component body length?
Possible challenges:
Be especially careful when moving product from hand assembly to automatic assembly.
Is the component body diameter compatible with the board thickness and insertion tooling requirements?
Possible challenges:
Watch out for very thick boards and/or large diameter components.
Is the component lead diameter compatible with the insertion tooling? (i.e. standard vs. large lead)
Possible challenges:
May have to sacrifice (to hand assembly) some insertions at either the large end or the small end of the spectrum.
Does the component require a stand off between the body and the PC board? Components requiring a stand off cannot be inserted with an axial inserter, but may be auto insertable with a radial inserter if packaged in the proper format.
Possible challenges:
“Stand-off” type resistors are more common where high power handling is required, power supplies, monitors, etc.
Radial
Are components packaged properly for automatic insertion? (Tape and reel/ammo pack)
Possible challenges:
Customer may have “sample” components in bulk, are these components readily available in a taped format?
If components are packaged on tape, use the following “quick check” list to get a general idea of which components may be automatically inserted: (See note 1 below)
Body diameter 13.0mm or less
“H” dimension (distance from centerline of feed hole to bottom of component) within acceptable limits
Lead diameter within acceptable limits
Possible challenges:
Radial taping specifications are quite involved, use “quick check” list as a sanity check, forward component samples to applications group for detailed evaluation.
Are the lead spans of the components compatible with standard automatic radial insertion? (i.e. 2.5mm, 5.0mm, 7.5mm or 10.0mm) (See note 2 below)
Possible challenges:
May have to “sacrifice” some components to hand assembly because of tooling footprint issues or span requirements.
Some PCB’s contain components are non-standard span’s, i.e. 2.0mm, 4.0mm.
Are transistor leads in line? (i.e. not in a “triangle” configuration)
If the component is required to stand off the PC board, are features built into the component lead to accomplish this?
Possible challenges:
Board designer may “require” a certain type of standoff without checking to see if the package is readily available, common with LED applications.
Notes:
1) The simplified guidelines were created to draw attention to the most common areas where components fall outside the limits for auto insertion. These simplified guidelines should only be used as a general guide. Component input must meet all criteria called out in the Radial General Specification.
Tooling selection will depend upon insertion span requirements as well as board density considerations. Muniak98-052B Revised 01-00


DVD Auto Insertion PCB
[embedyt]http://www.youtube.com/watch?v=WgXB7agrK5U[/embedyt]
PCB Auto assembly
[embedyt]http://www.youtube.com/watch?v=U15WGpumIS8[/embedyt]
Eyelet Manual Inserter
[embedyt]http://www.youtube.com/watch?v=NvmSNgrOt-M[/embedyt]
Odd form component Auto Assembly
[embedyt]http://www.youtube.com/watch?v=5mpUpmbSLKg[/embedyt]
Radial / DVD auto insertion assembly
[embedyt]http://www.youtube.com/watch?v=5L-zj8myzeY[/embedyt]
Odd form / Switch Insertion
[embedyt]http://www.youtube.com/watch?v=dNjlV-CIqkg[/embedyt]
