SMThelp Intelligent Material Management System 2.0

1. Home: The following figure shows the main interface of material management system. Click the “Home” button to return to this interface.

2. Out of stock

2.1 Click the “out of stock” button after the system automatically opens the “component selection interface”. In the component selection interface, you can generally search based on the component code, all the material information will be displayed after clicking the “search” button.

2.2 Double-click the material in the “component selection interface” to automatically add the material to the “out of stock” form.

2.3 In the component selection interface, you can generally search by inputting the component code.

2.4 After searching, you can click “select all” button to add the searched materials to the material out-of-stock list, or double-click a single data to add.

2.5 Click the “clear all” button to clear all the contents of the component out-of-stock table, and click the “exit” button to close the component selection interface.

2.6 Enter the quantity of all components to be taken out of stock in the location of “outbound quantity” and click the “confirm outbound” button.

2.6.1 When the quantity entered is greater than the quantity in stock, the system will automatically pop-up window to remind the quantity in stock is not enough for the material. Modify the outbound quantity and click “confirm outbound”.

2.6.2 After entering the outbound status, the “confirm warehousing” button of the system is automatically disabled to prevent the data from being recorded by mistake.

3. Warehousing

3.1 The system automatically opens the component selection interface after clicking the “warehousing” button, which is convenient to select the materials that need to be stored.

3.2 Component selection is the same as the component outbound as described above.

3.3 Enter the quantity to be stocked and click the “confirm warehousing” button.

3.4 The “confirm outbound” button is disabled after entering the component outbound status to prevent data from being recorded incorrectly by mistake.

4. Component search

4.1 Click “component search” button, the system will automatically enter the search interface.

4.2 Enter the component code in the component code input box to generally search the material code.

4.3 Click the “warning search” button to view all the materials with alert status.

4.4 After searching the material, if you double click the material in the search box, the corresponding material can be added to the list of purchase orders.

4.5 If you click the “select all” button, you can add the left and right contents of the search box to the list of purchase order. If you click the “clear all” button, you can delete all the materials in the purchase order list.

4.6 After clicking the “exit” button, the system automatically returns to the main screen and clears the purchase order. Click the “generate purchase order” button. The system will automatically generate the purchase order.

4.6.1 Generate Purchase Order: Click “generate purchase order” to automatically generate a purchase order, as shown in the following figure.

4.6.2 After entering the purchase quantity for the corresponding material, the system automatically calculates the amount and the total amount. The generated documents can be printed out directly.

4.7 Click the “back” button in the upper right corner of the purchase order to return to the main interface automatically.

5.Basic data

5.1 The system automatically opens the basic information maintenance interface after clicking the “basic data” button in the main interface.

5.2 After filling in the corresponding information in the basic data maintenance interface, you can enter new material information. If the material code entered is duplicated with the database, a pop-up window will automatically remind you.

5.3 The unit information for entering information is a drop-down selection, and the drop-down information can be maintained in the “drop-down information” worksheet.

5.4 Inventory information: click the “view inventory” button to automatically open the inventory list window.

5.4.1 Double click the location in the inventory list to automatically enter the storage position information into the brake position.

5.4.2 If you re-click on another location, the original data is automatically replaced.

5.4.3  Click the “exit” button to close the interface of the inventory list.

5.4.4 The following figure shows the inventory list and drop-down selection information of the “drop-down information” worksheet.

5.5 Click the “enter” button after entering all the information to enter the information into the database. Click on the “exit” button to return to the main interface.

What is the best clinching for THT radial electronic components assembly

Cut and Clinch Footprints

The cut and clinch cuts the component leads after they are inserted

through the PC board and then clinches them against the underside

of the PC board, securing the component in place.

THTLEDHighDensityInwradCut-Clinchapplications_00.png

What is the lowest cost Intelligent SMT reel storage racks solution?

SouthernMachineryreelstorageracksproposal__00.png

Simplifies receiving, storage and retrieval
Delivers full traceability
Automatically monitors stock levels

The SMT intelligent electronic material rack is a high floor area ratio shelf used to store the SMT patch devices.When loading, the materials are placed in the corresponding card position according to the plate, bind the LED indicator on the shelf through the corresponding relationship of the QR code of the material number / card position, and the ERP / MES system of the docking enterprise will automatically realize the operation of sending and receiving materials according to the light indication.
Delivery time is saved from two hours to 15 minutes, efficiency increase 8 times
Each shelf can store 1,400 plates of materials disorderly, and save the inventory area by 40%
The location of each item is quickly checked, and the inventory time can be reduced from 2 days to 2 hours
Material / warehouse / work order / station automatic binding, feeding and feeding process can prevent rigidity and error

Analysis of AVG market in PCB industry

At present, the automation level of the overall industry processing technology is average, mainly because the special equipment is relatively mature. First of all, small and medium-sized enterprises (small batches of products, many types, too large size range, etc.) have a low level of automation, mainly focusing on special process equipment + retractable board + labor. The medium and large enterprises (large batches, relatively uniform types and specifications) have a higher level of automation, mainly focusing on special process equipment + retractable boards + industrial robots, with manual assistance (inspection, maintenance).

On the whole, the demand for automation transformation of small and medium-sized enterprises is still relatively weak, while medium and large enterprises are on the contrary. Whether it is a newly planned workshop or an upgrade of an old production line, they are actively planning the participation of robots (industrial + AGV), aiming at PCB upstream. Raw materials need to build smarter warehousing; for the PCB factory, a more complete automatic warehousing system is needed, and it is best to integrate ERP, MES, etc.

Although the reality varies widely, automation and intelligence are still the general direction of development. As the basis for the development of the electronics industry, the scale and market of PCB materials and PCB boards will continue to grow with the development of 5G, smart cars, etc. Therefore, the requirements for product quality and process accuracy are higher, and automation and intelligent production scheduling will continue to grow. Demand will continue to rise.

Secondly, there are various types of products in the PCB industry, and the raw materials of the board are large and heavy. The effective transportation and management of semi-finished products or finished products during processing can improve production efficiency, so the level of automation should also be improved.

Whether it is from the perspective of product iteration or technological innovation, the automation transformation of the PCB industry is inevitable, and the efficiency and precision of industrial robots make it an important step in the transformation and upgrading of the industry.

(1) Demand characteristics:
①Industry production characteristics:
A. complex process
B. Work across floors and areas
C. Cancellation in the middle, expedited order
②Environmental requirements:
A. Workshop dust-free level requirements
B. Hydraulic structure (oil leakage)
③Line-side warehouse planning: line-side warehouse design, zoning management, and balanced production of upstream and downstream processes
④Transition period of production and commissioning:
A. There is no MES docking in the early stage;
B. Post-demand docking with MES/ERP/elevator control system
(2) The PCB industry is dedicated to the product form of intelligent AGV
Set up different vehicles for different scenarios to meet the loading requirements (the vehicle is determined according to the customer’s site, and the chassis structure of the vehicle is as consistent as possible). The application model can be selected according to the actual scene needs.

(3) Key technical difficulties related to product selection related benefits:
① The AGV needs to realize cross-regional transfer
● The AGV realizes automatic loading and unloading of production materials through automatic connection with Loader & Unloader;

● The AGV scheduling system is connected with the automatic door controller to realize cross-regional transfer of materials;
● Manage WIP line side warehouse material information to achieve accurate material supply.
② The AGV needs to realize cross-floor transfer;

● The AGV realizes automatic loading and unloading of production materials through automatic connection with the retractable trigger;
● The AGV scheduling system is connected with the hoist controller to realize cross-regional transfer of materials.

(4) Project benefit assessment
Five evaluation dimensions of project benefits: the proportion of production efficiency improvement, the proportion of operating cost control, the degree of shortening the product development cycle, the proportion of product defective product rate reduction, and energy utilization efficiency.

3D SMT machine model for better training and evaluation

We understand that SMT machine training and after sales service are a key to choose a new supplier.
Please click below links to see machine 3D models:
https://www.smthelp.net/html/SMT Production line.html https://www.smthelp.net/html/THT_Auto_Insertion_full_line.html


SMT AI Peripheral Equipments and Spare parts

ItemProduct NameURL 
1Bicycle https://www.smthelp.net/html/Bicycle.html
2FUJI_NXT_8mmfeeder https://www.smthelp.net/html/FUJI_NXT_8mmfeeder.html
3IC_tube_to_reeltapepackingmachine https://www.smthelp.net/html/IC_tube_to_reeltapepackingmachine.html
4PCBA_THT_fixture https://www.smthelp.net/html/PCBA_THT_fixture.html
5RS-1_Vibration_tube_FEEDER_BANK https://www.smthelp.net/html/RS-1_Vibration_tube_FEEDER_BANK.html
6SMT Label feeder.htmhttps://www.smthelp.net/html/SMT Label feeder.htm
7SMT reel tape feeder 72mm width https://www.smthelp.net/html/SMT reel tape feeder 72mm width.html
8SMT_axial_Radial_feeder_bank https://www.smthelp.net/html/SMT_axial_Radial_feeder_bank.html
9SMT_label_mounter https://www.smthelp.net/html/SMT_label_mounter.html
10SMT_Odd_Bowl_feeder https://www.smthelp.net/html/SMT_Odd_Bowl_feeder.html
11SMT_tray_feeder_B https://www.smthelp.net/html/SMT_tray_feeder_B.html
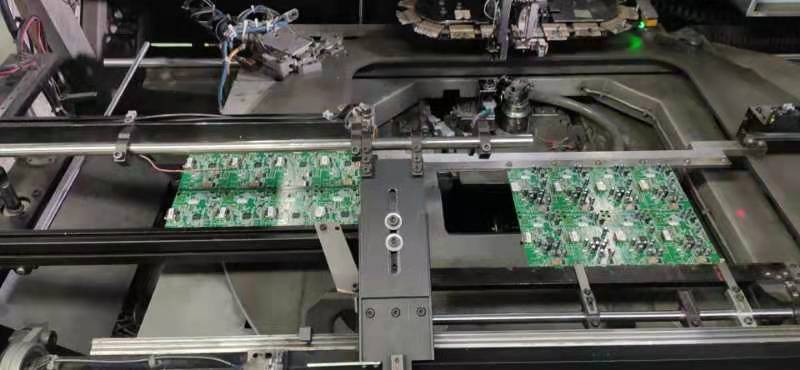
12SMThelp_PCBA-smt https://www.smthelp.net/html/SMThelp_PCBA-smt.html
13UIC_autoinsertion_Spareparts_list https://www.smthelp.net/html/UIC_autoinsertion_Spareparts_list.html
14wave_soldering_line https://www.smthelp.net/html/wave_soldering_line.html
15Wave soldering machine  https://www.smthelp.net/html/Wave soldering machine.html 
16Adapter JUKI Nozzle with Nozzle  https://www.smthelp.net/html/Adapter JUKI Nozzle with Nozzle.html 
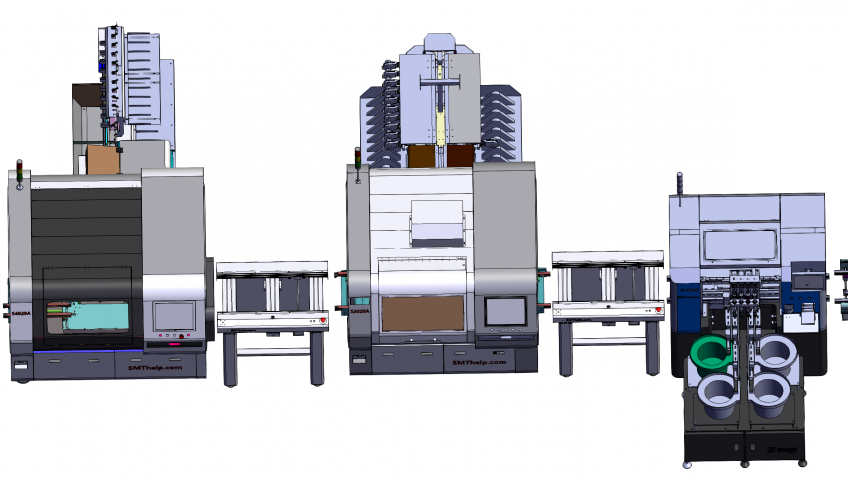
17Auto Insertion Axial Radial Oddform Production line  https://www.smthelp.net/html/Auto Insertion Axial Radial Oddform Production line.html 
18Bowl Radial reel feeder w JUKI cart https://www.smthelp.net/html/Bowl Radial reel feeder w JUKI cart.html
19Conveyor 1M nolight  https://www.smthelp.net/html/Conveyor 1M nolight.html 
20Feeder cart-Bowl Axial Radial Tube https://www.smthelp.net/html/Feeder cart-Bowl Axial Radial Tube.html
21FUJI glue nozzle  https://www.smthelp.net/html/FUJI glue nozzle.html 
22FUJI nozzle WGW-CZ  https://www.smthelp.net/html/FUJI nozzle WGW-CZ.html 
23FUJI nozzle WJH-CZ https://www.smthelp.net/html/FUJI nozzle WJH-CZ.html
24fuji NXT 8mm feeder  https://www.smthelp.net/html/fuji NXT 8mm feeder.html 
25fuji NXT 8mm feeder  https://www.smthelp.net/html/fuji NXT 8mm feeder.html 
26FUJI Sfab Radial tape feeder  https://www.smthelp.net/html/FUJI Sfab Radial tape feeder.html 
27Gripper nozzle for E-cap https://www.smthelp.net/html/Gripper nozzle for E-cap.html
28Hign end conveyor 1M w PCBA https://www.smthelp.net/html/Hign end conveyor 1M w PCBA.html
29JUKI 2 layer bowl feeder w cart  https://www.smthelp.net/html/JUKI 2 layer bowl feeder w cart.html 
30JUKI Gripper_Nozzle 2583 C https://www.smthelp.net/html/JUKI Gripper_Nozzle 2583 C.html
31Juki Nozzle 500 Assembly https://www.smthelp.net/html/Juki Nozzle 500 Assembly.html
32Juki Nozzle 500 Head Assembly  https://www.smthelp.net/html/Juki Nozzle 500 Head Assembly.html 
33JUKI Radial tape feeder big span https://www.smthelp.net/html/JUKI Radial tape feeder big span.html
34JUKI Radial tape L lead feeder  https://www.smthelp.net/html/JUKI Radial tape L lead feeder .html
35Juki2050 Feeder Cart w Radial axial https://www.smthelp.net/html/Juki2050 Feeder Cart w Radial axial.html
36Mobile charger PCBA  https://www.smthelp.net/html/Mobile charger PCBA.html 
37Nozzle adepter  https://www.smthelp.net/html/Nozzle adepter.html 
38Nozzle base  https://www.smthelp.net/html/Nozzle base.html 
39Odd form insertion Feeders w loader-unloader  https://www.smthelp.net/html/Odd form insertion Feeders w loader-unloader.html 
40Panasonic Al Spare parts list 2  https://www.smthelp.net/html/Panasonic Al Spare parts list 2.html 
41Panasonic CM602 Bowl feeder  https://www.smthelp.net/html/Panasonic CM602 Bowl feeder.html 
42PCB Combo loader destacker+Magazine  https://www.smthelp.net/html/PCB Combo loader destacker+Magazine.html 
43PCB Magazine  https://www.smthelp.net/html/PCB Magazine.html 
44Power supplier  https://www.smthelp.net/html/Power supplier.html 
45Radial Cutter clinch head https://www.smthelp.net/html/Radial Cutter clinch head.html
46Radial Insertion Head Assy w Ecap  https://www.smthelp.net/html/Radial Insertion Head Assy w Ecap.html 
47RS-1 FEEDER BANK w Vibe tube feeder  https://www.smthelp.net/html/RS-1 FEEDER BANK w Vibe tube feeder.html 
48S3010A Radial Insertion machine inline https://www.smthelp.net/html/S3010A Radial Insertion machine inline.html
49S3010A Radial machine no cover  https://www.smthelp.net/html/S3010A Radial machine no cover.html 
50S7000 Odd Form Insertion machine https://www.smthelp.net/html/S7000 Odd Form Insertion machine.html
51S7000 Oddform insertion 3 bowl feeder  https://www.smthelp.net/html/S7000 Oddform insertion 3 bowl feeder.html 
52S700D Odd Form Insertion machine https://www.smthelp.net/html/S700D Odd Form Insertion machine.html
53S-7020T Terminal insertion  https://www.smthelp.net/html/S-7020T Terminal insertion.html 
54S-7040 Oddform insertion w 4 bowl feeder  https://www.smthelp.net/html/S-7040 Oddform insertion w 4 bowl feeder.html 
55S-7040T Oddform insertion w Tray feeder  https://www.smthelp.net/html/S-7040T Oddform insertion w Tray feeder.html 
56SBH250 NGOK dual nagazine PCB unloader w magazine https://www.smthelp.net/html/SBH250 NGOK dual nagazine PCB unloader w magazine.html
57SBU460 Bare PCB destacker loader +conveyor  https://www.smthelp.net/html/SBU460 Bare PCB destacker loader +conveyor.html 
58SLD250 PCB loader w magazine https://www.smthelp.net/html/SLD250 PCB loader w magazine.html
59SLD250 S4020A+S3010A SULD250 Al machine production line https://www.smthelp.net/html/SLD250 S4020A+S3010A SULD250 Al machine production line.html
60SLD250+ S3020A +SULD250 Radial Insertion machine inline https://www.smthelp.net/html/SLD250+ S3020A +SULD250 Radial Insertion machine inline.html
61SLD250+S3010A(s)+SULD250 Al machine production line  https://www.smthelp.net/html/SLD250+S3010A(s)+SULD250 Al machine production line.html 
62SLD250+S3010A+S7040T(tray feeder)+SULD250 Al machine production line https://www.smthelp.net/html/SLD250+S3010A+S7040T(tray feeder)+SULD250 Al machine production line.html
63SLD390 SMT PCB loader (L-R) https://www.smthelp.net/html/SLD390 SMT PCB loader (L-R).html
64SLD390L SMT PCB loader(L-R)  https://www.smthelp.net/html/SLD390L SMT PCB loader(L-R).html 
65SLD390L SMT PCB loader(L-R)w magazine  https://www.smthelp.net/html/SLD390L SMT PCB loader(L-R)w magazine.html 
66SLVC200 Vacuum PCB loader +conveyor  https://www.smthelp.net/html/SLVC200 Vacuum PCB loader +conveyor.html 
67SLVC200 Vacuum PCB loader  https://www.smthelp.net/html/SLVC200 Vacuum PCB loader.html 
68SMT 2 rail bowl feeder  https://www.smthelp.net/html/SMT 2 rail bowl feeder.html 
69SMT BHS line1  https://www.smthelp.net/html/SMT BHS line1.html 
70SMT CART FEEDER  https://www.smthelp.net/html/SMT CART FEEDER.html 
71SMT customized nozzle design n manufacturing https://www.smthelp.net/html/SMT customized nozzle design n manufacturing.html
72SMT Drone main control board  https://www.smthelp.net/html/SMT Drone main control board.html 
73SMT Gripper nozzle customized https://www.smthelp.net/html/SMT Gripper nozzle customized.html
74SMT Gripper nozzle JUKI  https://www.smthelp.net/html/SMT Gripper nozzle JUKI.html 
75SMT label feeder  https://www.smthelp.net/html/SMT label feeder.html 
76SMT nozzle list 1  https://www.smthelp.net/html/SMT nozzle list 1.html 
77SMT Nozzle MiniChuck_closing w component  https://www.smthelp.net/html/SMT Nozzle MiniChuck_closing w component.html 
78SMT PCB 90 turn conveyor  https://www.smthelp.net/html/SMT PCB 90 turn conveyor.html 
79SMT PCB conveyor 1M w lighting https://www.smthelp.net/html/SMT PCB conveyor 1M w lighting.html
80SMT PCB Flipper (turn over) + conveyor w PCBA  https://www.smthelp.net/html/SMT PCB Flipper (turn over) + conveyor w PCBA.html 
81SMT PCB Flipper (turn over) conveyor https://www.smthelp.net/html/SMT PCB Flipper (turn over) conveyor.html
82SMT PCB Shuttle conveyor https://www.smthelp.net/html/SMT PCB Shuttle conveyor.html
83SMT PnP mounter  https://www.smthelp.net/html/SMT PnP mounter.html 
84SMT Production line  https://www.smthelp.net/html/SMT Production line.html 
85SMT reflow oven https://www.smthelp.net/html/SMT reflow oven.html
86SMT Screen printer  https://www.smthelp.net/html/SMT Screen printer.html 
87SMT THT bare PCB board https://www.smthelp.net/html/SMT THT bare PCB board.html
88SMT THT DC Power PCBA  https://www.smthelp.net/html/SMT THT DC Power PCBA.html 
89SMT tray feeder -B  https://www.smthelp.net/html/SMT tray feeder -B.html 
90SMT Tray feeder https://www.smthelp.net/html/SMT Tray feeder.html
91SMT tube feeder  https://www.smthelp.net/html/SMT tube feeder.html 
92SMT Vacuum Nozzle 505 https://www.smthelp.net/html/SMT Vacuum Nozzle 505.html
93SMThelp Axial taped feeder https://www.smthelp.net/html/SMThelp Axial taped feeder.html
94SMThelp PCB BHS production line  https://www.smthelp.net/html/SMThelp PCB BHS production line.html 
95SMThelp PCB Magazine w PCBA  https://www.smthelp.net/html/SMThelp PCB Magazine w PCBA.html 
96SMThelp PCBA 2 in 1  https://www.smthelp.net/html/SMThelp PCBA 2 in 1.html 
97SMThelp SMT-THT pcba 8in1 https://www.smthelp.net/html/SMThelp SMT-THT pcba 8in1.html
98SMThelp THT pcb assembly 9in1 https://www.smthelp.net/html/SMThelp THT pcb assembly 9in1.html
99SMThelp THT pcba  https://www.smthelp.net/html/SMThelp THT pcba.html 
100SULD250 PCB Unloader (R-L)  https://www.smthelp.net/html/SULD250 PCB Unloader (R-L).html 
101SULD390 PCB Unloader (L-R) https://www.smthelp.net/html/SULD390 PCB Unloader (L-R).html
102SULD390 PCB Unloader (R-L) w Magazine  https://www.smthelp.net/html/SULD390 PCB Unloader (R-L) w Magazine.html 
103SULD390 PCB Unloader (R-L)  https://www.smthelp.net/html/SULD390 PCB Unloader (R-L).html 
104SULD390 PCB Unloader (R-L)  https://www.smthelp.net/html/SULD390 PCB Unloader (R-L).html 
105SULD460 L-type PCB unloader (L-R) https://www.smthelp.net/html/SULD460 L-type PCB unloader (L-R).html
106THT axial radial PCBA https://www.smthelp.net/html/THT axial radial PCBA.html
107THT Capacitor lead cut-forming https://www.smthelp.net/html/THT Capacitor lead cut-forming.html
108Tray feeder w feeder bank https://www.smthelp.net/html/Tray feeder w feeder bank.html
109Tray feeder https://www.smthelp.net/html/Tray feeder.html
110UIC BHS Assy https://www.smthelp.net/html/UIC BHS Assy.html
111UIC FJ head assy  https://www.smthelp.net/html/UIC FJ head assy.html 
112UIC Radial Carrier Clip  https://www.smthelp.net/html/UIC Radial Carrier Clip.html 
113UIC Radial Feeder and Carrier Clip (1)  https://www.smthelp.net/html/UIC Radial Feeder and Carrier Clip (1).html 
114UIC Radial lead component carrier clip w Ecap https://www.smthelp.net/html/UIC Radial lead component carrier clip w Ecap.html
115UIC Radial lead component carrier clip https://www.smthelp.net/html/UIC Radial lead component carrier clip.html
116UIC spare parts list 3  https://www.smthelp.net/html/UIC spare parts list 3.html 
117wave soldering line  https://www.smthelp.net/html/wave soldering line.html 
118Wave soldering output conveyor  https://www.smthelp.net/html/Wave soldering output conveyor.html 
119What is SMT Gripper nozzle https://www.smthelp.net/html/What is SMT Gripper nozzle.html
120What is SMT Gripper nozzle  https://www.smthelp.net/html/What is SMT Gripper nozzle.html 
121X_Y_workingtable  https://www.smthelp.net/html/X_Y_workingtable.html 
122Yamaha nozzle YMH-100ll-31 https://www.smthelp.net/html/Yamaha nozzle YMH-100ll-31.html
123Yamaha nozzle YMH-100ll-31  https://www.smthelp.net/html/Yamaha nozzle YMH-100ll-31.html 
124Yamaha nozzleYMH-112-52  https://www.smthelp.net/html/Yamaha nozzleYMH-112-52.html 
125Yamaha nozzleYMH-112-52  https://www.smthelp.net/html/Yamaha nozzleYMH-112-52.html 
126Ymaha nozzle YMH-112-52  https://www.smthelp.net/html/Ymaha nozzle YMH-112-52.html 
127Ymaha nozzle YMH-112-52 https://www.smthelp.net/html/Ymaha nozzle YMH-112-52.html
128Auto Tray n Tube stick feeder with Robot platformhttps://www.smthelp.net/html/Auto Tray n Tube stick feeder with Robot platform.html

THT production line:

ItemProduct NameURL 
1S3010A Radial Insertion Machine https://www.smthelp.net/html/S3010A Radial Insertion Machine.html
2S7000P Pin Eyelet Inserter w loader https://www.smthelp.net/html/S7000P Pin Eyelet Inserter w loader.html
3S4000H JW Axial Insertion machine w loader https://www.smthelp.net/html/S4000H JW Axial Insertion machine w loader.html
4THT   Auto   Insertion full             line https://www.smthelp.net/html/THT_Auto_Insertion_full_line.html
5wave soldering line https://www.smthelp.net/html/wave soldering line.html
6Xy workingtable https://www.smthelp.net/html/X_Y_workingtable.html
7PIN   Eyelet Odd  inserter https://www.smthelp.net/html/PIN_Eyelet_Odd_inserter.html
8S7000T Reel tape terminal inserter w PCB loading https://www.smthelp.net/html/S7000T Reel tape terminal inserter w PCB loading.html
9Manual Assembly line https://www.smthelp.net/html/Manual Assembly line.html
10Terminal PIN Eyelet  Inserter 2 headbowl PCB https://www.smthelp.net/html/Terminal_PIN_Eyelet_Inserter_2_head_bowl_PCB.html
11S-7020TTerminalinsertion https://www.smthelp.net/html/S-7020T_Terminal_insertion.html
12S7000T Reeltape             terminal             inserter             w             PCB loading https://www.smthelp.net/html/S7000T_Reel_tape_terminal_inserter_w_PCB loading.html
13S7040 Oddform Insertion machine x2 w F-B feeders PCB loading https://www.smthelp.net/html/S7040 Oddform Insertion machine x2 w F-B feeders PCB loading.html
14S7040 Oddform Insertion machine x2 w Front feeders https://www.smthelp.net/html/S7040 Oddform Insertion machine x2 w Front feeders.html
15S7040 OddFrom Insertion Machine w feeder PCB loading https://www.smthelp.net/html/S7040 OddFrom Insertion Machine w feeder PCB loading.html
16S7040 Oddform Insertion machine w Front feeders https://www.smthelp.net/html/S7040 Oddform Insertion machine w Front feeders.html
17Manual assemble line 2 https://www.smthelp.net/html/Manual assemble line 2.html
18S3010A Radial Insertion Machine w PCB loader inloader https://www.smthelp.net/html/S3010A Radial Insertion Machine w PCB loader inloader.html
19Wave Soldering machine and Manual assemble line 2 https://www.smthelp.net/html/Wave Soldering machine and Manual assemble line 2.html
20S7040 Oddform Insertion machine https://www.smthelp.net/html/S7040 Oddform Insertion machine.html
21SLD250 PCB Magazine Loader (250mm) w PCB https://www.smthelp.net/html/SLD250 PCB Magazine Loader (250mm) w PCB.html
22S3010A Radial Insertion machine inline https://www.smthelp.net/html/S3010A Radial Insertion machine inline.html
23SLD250 S3020ASULD250   Radial Insertion  machine inline https://www.smthelp.net/html/SLD250+%20S3020A%20+SULD250%20Radial%20Insertion%20machine%20inline.html

SMT production line:

ItemProduct NameURL 
1Mutil Line shuttle to 3 oven   https://www.smthelp.net/html/Mutil Line shuttle to 3 oven.html
2Reflow Oven 8 zones   https://www.smthelp.net/html/Reflow Oven 8 zones.html
3SMT loader Printer SPI NXT M3x4 (R-L)   https://www.smthelp.net/html/SMT loader Printer SPI NXT M3x4 (R-L).html
4SMT Line Loader DEK SPI NXT   https://www.smthelp.net/html/SMT Line Loader DEK SPI NXT.html
5SMTLineLoaderDEKSPINXT   https://www.smthelp.net/html/SMTLineLoaderDEKSPINXT.html
6SMT_mounter   https://www.smthelp.net/html/SMT_mounter.html
7PCBA Manual assembly with Wave Soldering machine line   https://www.smthelp.net/html/PCBA Manual assembly with Wave Soldering machine line.html
8SMT Line L-R loader printer SPI mounter   https://www.smthelp.net/html/SMT Line L-R loader printer SPI mounter.html
9DEK Printer   https://www.smthelp.net/html/DEK Printer.html
10AOI with NGOK Unloader   https://www.smthelp.net/html/AOI with NGOK Unloader.html
11NG Buffer 1M   https://www.smthelp.net/html/NG Buffer 1M.html
12SMTtrayfeederwpickuphead   https://www.smthelp.net/html/SMTtrayfeederwpickuphead.html
13Dual Magazine Unloader   https://www.smthelp.net/html/Dual Magazine Unloader.html
14DualMagazineUnloader   https://www.smthelp.net/html/DualMagazineUnloader.html
15SMT Mounter   https://www.smthelp.net/html/SMT Mounter.html
16SMT Mounter.sync-conflict-20220307-122016-RCA3U2I   https://www.smthelp.net/html/SMT Mounter.sync-conflict-20220307-122016-RCA3U2I.html
17PCB NG Buffer conveyor 0.8M length 460mm width   https://www.smthelp.net/html/PCB NG Buffer conveyor 0.8M length 460mm width.html
18S350DLC_1Mconveyorwithlightingcooling   https://www.smthelp.net/html/S350DLC_1Mconveyorwithlightingcooling.html
19PCB Buffer with cooling L-R 1M   https://www.smthelp.net/html/PCB Buffer with cooling L-R 1M.html
20PCB NGOK Unloader   https://www.smthelp.net/html/PCB NGOK Unloader.html
21Dual line Unloader   https://www.smthelp.net/html/Dual line Unloader.html
22PCB Magazine and Vacuum combo loader w PCB   https://www.smthelp.net/html/PCB Magazine and Vacuum combo loader w PCB.html
23SLD250 PCB Magazine Loader (250mm)   https://www.smthelp.net/html/SLD250 PCB Magazine Loader (250mm).html
24PCB Magazine and Vacuum combo loader   https://www.smthelp.net/html/PCB Magazine and Vacuum combo loader.html
25Dual line shuttle to Dual rail oven   https://www.smthelp.net/html/Dual line shuttle to Dual rail oven.html
26SMT production line std   https://www.smthelp.net/html/SMT production line std.html
27SMT product line 1   https://www.smthelp.net/html/SMT product line 1.html
28Dual rail Oven Buffer AOI Unloader   https://www.smthelp.net/html/Dual rail Oven Buffer AOI Unloader.html
29Mutil Line NXT shuttle to 1 oven.htmhttps://www.smthelp.net/html/Mutil Line NXT shuttle to 1 oven.htm
30SMT production line loader printer mounter   https://www.smthelp.net/html/SMT production line loader printer mounter.html
31SMT production line loader printer mounter R-L   https://www.smthelp.net/html/SMT production line loader printer mounter R-L.html
32SMT product line Printer Mounter Over w loader magazine   https://www.smthelp.net/html/SMT product line Printer Mounter Over w loader magazine.html
33SMTvacuumnozzl   https://www.smthelp.net/html/SMTvacuumnozzl.html
34Wave soldering machine   https://www.smthelp.net/html/Wave soldering machine.html
35LED-mounter_semiauto   https://www.smthelp.net/html/LED-mounter_semiauto.html
36UIC FJ 7 head assy   https://www.smthelp.net/html/UIC FJ 7 head assy.html
37SMT tube feeder   https://www.smthelp.net/html/SMT tube feeder.html
38Desktop SMT pick n place mounter   https://www.smthelp.net/html/Desktop SMT pick n place mounter.html
39DesktopSMTpicknplacemounter   https://www.smthelp.net/html/DesktopSMTpicknplacemounter.html
40SMTreeltapefeeder   https://www.smthelp.net/html/SMTreeltapefeeder.html
41SMT shuttle machine   https://www.smthelp.net/html/SMT shuttle machine.html
42Wave soldering input conveyor   https://www.smthelp.net/html/Wave soldering input conveyor.html
43SMT placement head 6 nozzles   https://www.smthelp.net/html/SMT placement head 6 nozzles.html
44SMT UIC IL 4 head base assy   https://www.smthelp.net/html/SMT UIC IL 4 head base assy.html
45Magazine S   https://www.smthelp.net/html/Magazine S.html
46SMT Label feeder   https://www.smthelp.net/html/SMT Label feeder.html
47Manual assemble line 2   https://www.smthelp.net/html/Manual assemble line 2.html
48SMTLabelfeeder   https://www.smthelp.net/html/SMTLabelfeeder.html
49PCB NG Buffer conveyor 0.8M length 460mm width.htmhttps://www.smthelp.net/html/PCB NG Buffer conveyor 0.8M length 460mm width.htm
50Radial Feeder   https://www.smthelp.net/html/Radial Feeder.html
51PCBflipperconveyor   https://www.smthelp.net/html/PCBflipperconveyor.html
52PCB flipper conveyor   https://www.smthelp.net/html/PCB flipper conveyor.html
53RadialFeeder   https://www.smthelp.net/html/RadialFeeder.html
54Wave soldering output conveyor   https://www.smthelp.net/html/Wave soldering output conveyor.html
55SMTAxialFeeder   https://www.smthelp.net/html/SMTAxialFeeder.html
56SMT reel tape feeder 72mm width   https://www.smthelp.net/html/SMT reel tape feeder 72mm width.html
57S350C Conveyor 1M   https://www.smthelp.net/html/S350C Conveyor 1M.html
58SMT_smalltubefeeder   https://www.smthelp.net/html/SMT_smalltubefeeder.html
59Desktop robot soldering machine   https://www.smthelp.net/html/Desktop robot soldering machine.html
60SMT GKG Printer   https://www.smthelp.net/html/SMT GKG Printer.html
61SMTGrippernozzle   https://www.smthelp.net/html/SMTGrippernozzle.html
62FUJI NXT M3 Mounter   https://www.smthelp.net/html/FUJI NXT M3 Mounter.html
63AOI machine   https://www.smthelp.net/html/AOI machine.html
64SMT PCB Loader Flipper (turn over) + conveyor w PCBA   https://www.smthelp.net/html/SMT PCB Loader Flipper (turn over) + conveyor w PCBA.html
65SMT PCB Flipper (turn over)conveyor w PCBA   https://www.smthelp.net/html/SMT PCB Flipper (turn over)conveyor w PCBA.html
66SMT PCB Flipper (turn over) conveyor   https://www.smthelp.net/html/SMT PCB Flipper (turn over) conveyor.html

3D PCBA model view SMT THT product

We design and manufacture SMT/Auto Insertion PCB assembly machine for smart SMT factory in Shenzhen China. We help companies looking to low cost equipment with intellegent, ROI-driven assembly equipment solutions. Please take a look below 3D PCBA model and talk to us today to learn how we can help you。 info@smthelp.net


SMT THT PCB boards

A difference between Electric Stencil Cleaner(SME-800) and Pneumatic Stencil Cleaner(SME-750)

SME800 Electric Stencil Cleaning Machine

S-1688 Pneumatic Stencil Cleaning Machine

Comparison list

[embeddoc url=”https://www.smthelp.net/wp-content/uploads/2020/11/A-difference-between-SME-800-Electric-Stencil-Cleaner-and-SME-750-Pneumatic-Stencil-Cleaner-1.doc” download=”all” viewer=”microsoft”]

How to make SMT stencil by Laser cutting machine for EMS factory

[embeddoc url=”https://www.smthelp.net/wp-content/uploads/2020/05/SMT-stencil-laser-making-machine.pdf” download=”all”]SMT stencil production process (reference)

General technical requirements:
1. Screen frame: The frame size is determined according to the requirements of the printing machine. Taking DEK265 and MPM UP 3000 as an example, the frame size is 29ˊ
29ˊ, using aluminum alloy, frame profile specification is 1.5ˊ 1.5ˊ.

  1. Stretching the net: Adopt the red glue + aluminum tape method, at the junction of the aluminum frame and the glue, a layer of protective paint must be evenly scraped. At the same time, in order to ensure that the screen has sufficient tension and good flatness, it is recommended that the stainless steel plate be kept 25mm-50mm away from the inside of the screen frame.
  2. Reference point: According to the size and shape provided by the PCB information, the opening is 1: 1, and the translucent is engraved on the reverse side of the printing. At the corresponding coordinates, the entire PCB opens at least two reference points.

  3. Opening requirements: 1.41. The position and size ensure a high opening accuracy, and the opening is strictly in accordance with the prescribed opening method. 1.42. The size of the independent opening cannot be too large, the width cannot be greater than 2mm, and a 0.4mm bridge is required in the middle of the pad size greater than 2mm, so as not to affect the strength of the stencil.
    1.43. The opening area must be centered.

  4. Characters: In order to facilitate production, it is recommended to engrave the following characters in the lower left or lower right corner of the screen: Model; T; Date; the name of the company that made the screen.

  5. Stencil thickness: In order to ensure the amount of solder paste printing and welding quality, the surface of the stencil is smooth and even, and the thickness is uniform. The stencil thickness refers to the above table. The stencil thickness should meet the premise of the finest pitch QFP BGA. If there are 0.5mmQFP and CHIP 0402 components on the PCB, the stencil thickness is 0.12mm; if there are 0.5mmQFP and CHIP 0603 or more components on the PCB, the stencil thickness is 0.15mm;

The opening shape and size requirements of printed tin screen:

  1. General principle: According to the requirements of the IPC-7525 steel mesh design guide, in order to ensure that the solder paste can be smoothly released from the opening of the stencil to the PCB pad, in the opening of the stencil  to view polyester 1. The area ratio / width-to-thickness ratio area ratio is greater than 0.66 2. The mesh hole wall is smooth. Especially for QFP and CSP with a pitch of less than 0.5mm, suppliers are required to perform electro-polishing during the manufacturing process. 3.) With the printing surface as the upper side, the lower opening of the mesh opening should be 0.01mm or 0.02mm wider than the upper opening, that is, the opening is inverted tapered, which facilitates the ineffective release of solder paste and reduces the number of times of cleaning the stencil. Normally, the size and shape of the opening of the SMT element is the same as the pad, and the opening is 1: 1. Under special circumstances, for some special SMT components, the size and shape of the screen openings are specified.
    No. 2 Special SMT component screen opening:

2.1CHIP components: CHIP components above 0603, in order to effectively prevent the generation of tin beads.

2.2SOT89 components: Due to the large pad and small pad spacing between components, soldering quality problems such as tin beads are prone to occur.

2.3 SOT252 component: Because SOT252 has a large pad, it is easy to produce tin beads, and the reflow soldering tension causes displacement.
Look 2.4IC: A. For the standard pad design, PITCH》 = 0.65mm IC, the opening width is 90% of the pad width, and the length is unchanged.
B. For the standard pad design, IC with PITCH <= 005mm, because of its small PITCH, it is easy to produce bridging, the length direction of the steel mesh opening is unchanged, the opening width is 0.5PITCH, and the opening width is 0.25mm.
2.5 Other situations: One pad is too large, usually one side is greater than 4mm, and the other side is not less than 2.5mm, in order to prevent the generation of tin beads and displacement caused by the effect of tension, the mesh opening is recommended to be divided by grid lines In this way, the grid line width is 0.5mm and the grid size is 2mm, which can be evenly divided according to the pad size.

The shape and size requirements of the opening of the printed rubber screen: glue is used for simple PCB assembly. Dispensing is preferred. CHIP, MELF, SOT components are printed through the screen, and IC is used to avoid glue scraping. Here, only the recommended opening size and opening shape of CHIP, MELF and SOT offset printing plates are given.
1. Two diagonal positioning holes must be opened at the diagonal of the stencil. Select FIDUCIAL MARK to open the hole.

  1. The openings are all elongated. Inspection method 1) Visually check that the opening is centered and the net is flat. 2) Check the correctness of the stencil opening through the PCB entity. 3) Examine the length and width of the screen opening and the smoothness of the hole wall and the surface of the steel sheet with a scaled high power microscope. 4) The thickness of the steel sheet is verified by detecting the thickness of the solder paste after printing tin, that is, the result verification. Conclusion The technical requirements for screen design have been tested for a period of time, and the print quality has been well controlled. The PPM of SMT welding quality has dropped from about 1300ppm to about 130ppm. Due to the development of the packaging direction of modern electronic components, higher requirements have also been placed on the design of steel mesh. Is a subject that we need to focus on in the future


UIC, EPC-16 or -1316 Boot Sector and BIOS Corruption Procedure for Re-flash

Procedure


Symptoms of corrupted BIOS and/or Boot Block:

  • No video signal from the EPC-16 or EPC-1316
  • No activity on
  1. The keyboard, no status lights at power-on
  2. The floppy drive with a disk in or out
  3. The hard disk drive evident by the light off after a certain amount of time
  • The EPC-16 or -1316 is trying to access the CD-ROM drive with failed attempts every second or so.
  • The EPC-16 or -1316 is in this cycle indefinitely


Steps to take:

  1. Power down the EPC-16 or -1316 board/machine.
  2. Make sure that this instructions file is opened on a different computer.
  3. At the last step of these instructions is an embedded object of the .zip folder; it contains all of the files needed for this procedure.
  4. Right click on the .zip folder, select ‘Package Object’ and click on ‘Activate Contents’. If a message regarding a trustworthy source is displayed, confirm that this source can be trusted. USE “EPC-16FBD1.00.9” FOR EPC-16 AND “EPC-16FBD1.00.10” FOR EPC-1316.
  5. Create a new folder on the Desktop and rename it to “EPC-16FBD1.00.10”
  6. Click ‘File’, then select and click on ‘Extract All…’
  7. Extract the .zip folder into the folder on the Desktop, created in Step 3.
  8. Obtain a 3.5in Floppy Disk and insert it into the drive.
  9. Open the “EPC-16FBD1.00.10” folder from the Desktop
  10. To run an MS-DOS program, double click on the CRISDISK.BAT file.
  11. To run a Windows Application, double click on the WINCRIS.EXE file.
  12. Go through prompts of the program attentively; and a crisis disk will be created.
  13. Remove the EPC-16 board from the VME chassis/rack.
  14. At the bottom of the board there are 2 x 5 jumper pins: MFG/Flash. (Figure 1)

Figure 1 EPC-1316 Board jumper pin location

EPC1316 BIOS setup 3

  1. See Figure 2 for PIN-out of the Jumper pins.

Figure 2 EPC-1316 Board jumper pin numbering

EPC1316 BIOS setup 1

  1. Using 2 jumpers (Figure 3): place one to jumper pins 4-6. (jumper setting ‘Write Boot Block’)
  2. Place the second to jumper pins 3-5. (jumper setting ‘Force flash recovery’)

Figure 3 EPC-1316 Board flash jumpers configuration

EPC1316 BIOS setup 2

  1. Replace the EPC-1316 board to the VME chassis/rack.
  2. Insert the 3.5in Floppy Disk that was created from the steps above into the floppy drive.
  3. Power-up the machine/chassis/EPC-1316.
  4. If the status light on the floppy drive comes on and stays on, then the floppy disk is being accessed.
  5. When the floppy drive stops accessing the Floppy Disk, wait about 15 seconds, and then remove the disk. ***PROCEDURE ONLY SEEMS TO WORK CONSISTENTLY IF YOU FLASH TWICE. SEE NOTES AT END***
  6. Power down the EPC-1316, and remove it from the VME interface.
  7. Remove jumpers from the board and replace the board to the VME interface.
  8. Power-up the machine/chassis/EPC-1316 and make sure that it boots the operating system.
  9. Refer to UIC procedures for proper BIOS settings/ configuration


ANDY’S NOTES

With 3-5 and 4-6 jumpers installed EPC-16 stays in a forced flash write cycle.  The write cycle takes 1 minute 30 secs and then there is a 50 second wait before it starts writing again.  What has consistently worked for me is to do the following:

  1. Install jumpers.
  2. Install EP-16.  No need to connect cabling (you can’t see anything anyways).
  3. Power on machine.  Set timer for 4 minutes. Verify that the activity light on floppy drive starts.
  4. When timer has expired power off machine.  (See Sequence of events below for details.)
  5. Remove EPC-16 card.
  6. Remove jumpers and install EPC-16. Install cables this time.
  7. Configure EPC-16 as per Advanced Support Information in UIC UPS+ support documentation.


Sequence of Events during “4 MINUTE TIMER”

  1. 1ST FLASH SEQUENCE – 1MIN 30SEC
  2. WAIT CYCLE – 50 SECS
  3. 2ND FLASH SEQUENCE – 1MIN 30 SECS
  4. CLOSING OF FLASH PROGRAM – 15 SECS


Original UIC Knowledge Base states to wait 5 seconds after activity light goes out.  This is not long enough for flash program to complete.


If you miss the 50 second window and activity light starts again, wait for light to go out in another minute and 30 then give it another 15 seconds and p

How to upgrade Manual PCB loading to Automatic in Universal Auto Insertion machine

We’ve specialized in AI SMT machines and spare parts support for 20 years. We mainly design manufacture SMT/AI machine, also providing full services support and selling spare parts for electronic manufacturing PCB assembly. With high-quality products and superior service, we’ve established long-term and valued relationships with GE, Foxconn, Schneider Electric and many other famous brands.

— Decreasing labor cost
— Easier manufacturing and operations management
— Predictable Product Quality – Less repairs
— No wrong parts nor wrong polarity
— Less risk of damage due to human contact (contamination, ESD, physical damage to components)
— Better clinching, less risk of solder issues.
— Smaller factory space required to produce same volume of product
 
https://www.smthelp.net/through-hole-design-guide-line/
 

How THT Radial Lead electronic component feeder working


Southern machinery offers efficient and productive feeding for THT radial lead electronic components with the following features:

  • Integrated lead cutting unit
  • Wide component range(lead span up to 22mm)
  • Easy readjustment
  • Excellent price-performance ratio
  • Intelligent communication with placement system
  • Easy user interface
  • Quickly lead-time: 4~6 weeks


Customized Pneumatic Component Feeders for Taped Parts , bends and forms taped axial components and holds them so that the pliers of a robot can pick them up.


Welcome inquiry: info@smthelp.net


Automatic Electronic component Lead Cutter Machine for Smart EMS factory PCB assembly

Component Lead Cut by manually?High Labor cost?Quality issue?S-430AC Auto Lead Cutter Machine

Speed: 7200 CPH
Machine Dimension (LWH):720* 720* 900
Cutter Clinch Direction: X axis 400mm * Y axis 280mm * Z axis 100mm * R axis 360°rotation * U axis (manual) 90 °
PCB Size: Min.20mm* 50mm Max. 200mm* 360mm . (Optional 280mm* 380mm)
PCBA Heigth: Max110mm. Optional for other size.
Direction: L to R (R to L)
Machine Weight :100KG
Power Supply: 220V/1.5KW (Energy saving)
Type of pliers: Special pliers for Pneumatic machine
Cutting capacity: Copper wire Max ∮ 3.0mm
MES system: connect production lines to achieve data management (optional)
Extraction part pin method: negative pressure suction container
Shearing capacity: copper wire ∮ 3.0mm or less
(Change different cutting pliers for different wire diameters)
Shearing efficiency: 120 points / min